
In this article, you'll learn about:
Adding the account Hyperglance is running in
The Hyperglance instance has an IAM policy applied that allows Hyperglance to authenticate against the AWS API to collect the account Hyperglance is running in. To tell Hyperglance to collect data on that account complete the following steps.
Step 1
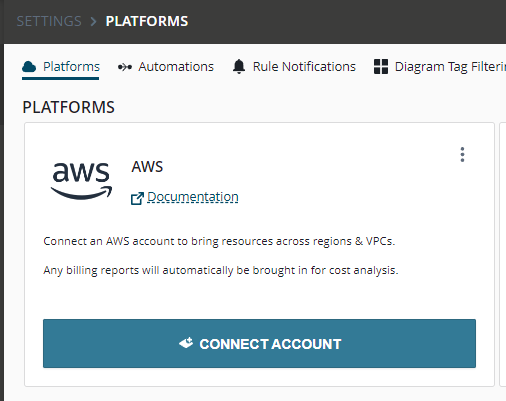
Go to Settings > Platforms > Select CONNECT ACCOUNT under AWS.
Step 2 - Complete the form
- Add in an 'Account Alias' (memorable text to name the account),
- Select Single Account
- Leave the Role ARN and access+secret keys blank (the Hyperglance instance already has the IAM policy applied for that account.)
- Leave "All Inventory & Billing Data" as the selected option.
- Select the regions you are interested in.
- Press 'Submit'.
Step-by-Step Guide to add additional accounts
Part 1: Create a policy in the account that you would like to connect to Hyperglance
Alternatively you can deploy the role and policy from CloudFormation.
a) Head to the 'IAM' section of your AWS console
b) Visit 'Policies' then 'Create Policy'
c) Select the 'JSON' tab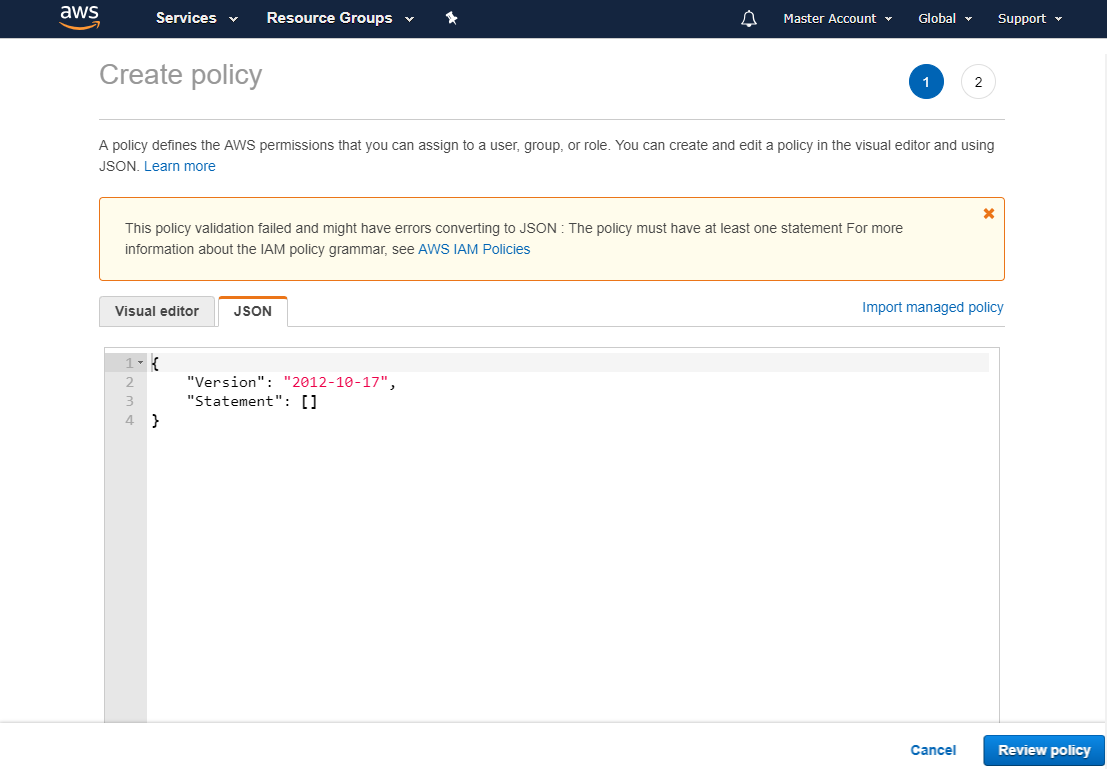
d) Copy one of the JSON policies from the Hyperglance IAM requirements guide, pasting it over the existing text. You can choose a Read-Only or Read-Write policy.
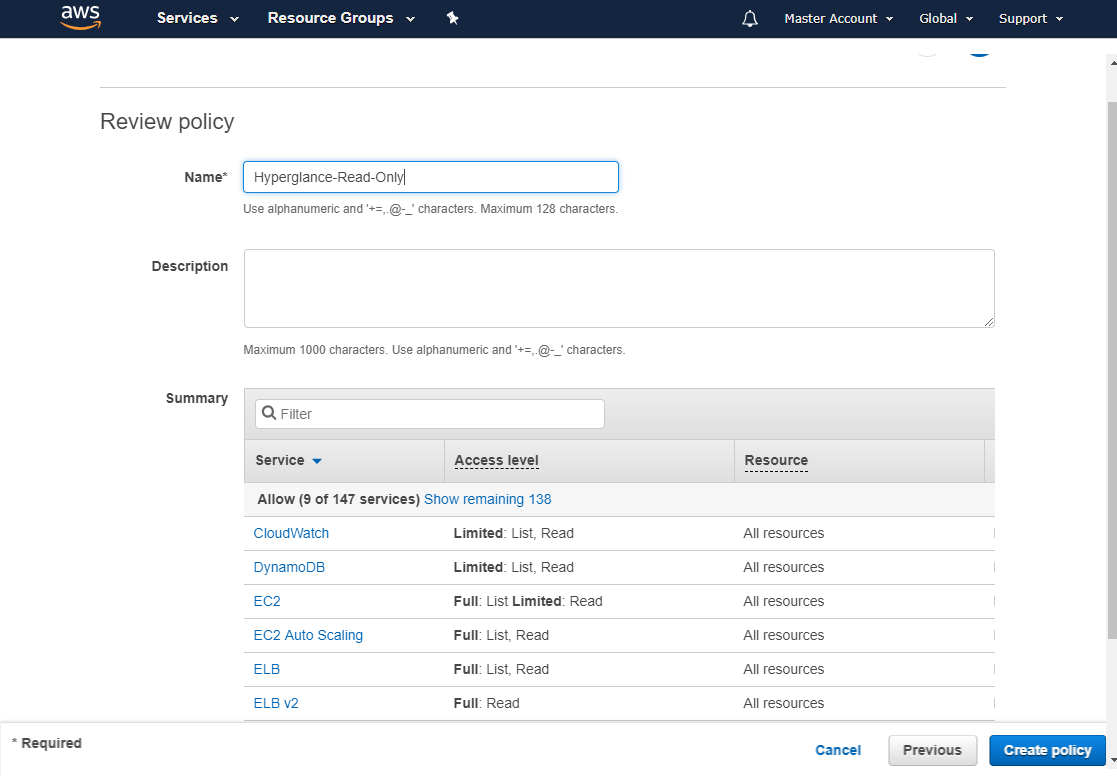
e) Name the Policy and select 'Create Policy'
Part 2: Create a role
a) Go to the account Hyperglance is running in, and copy the 'Account ID' to your clipboard. The easiest way to find this is via 'My Account' in your AWS console.
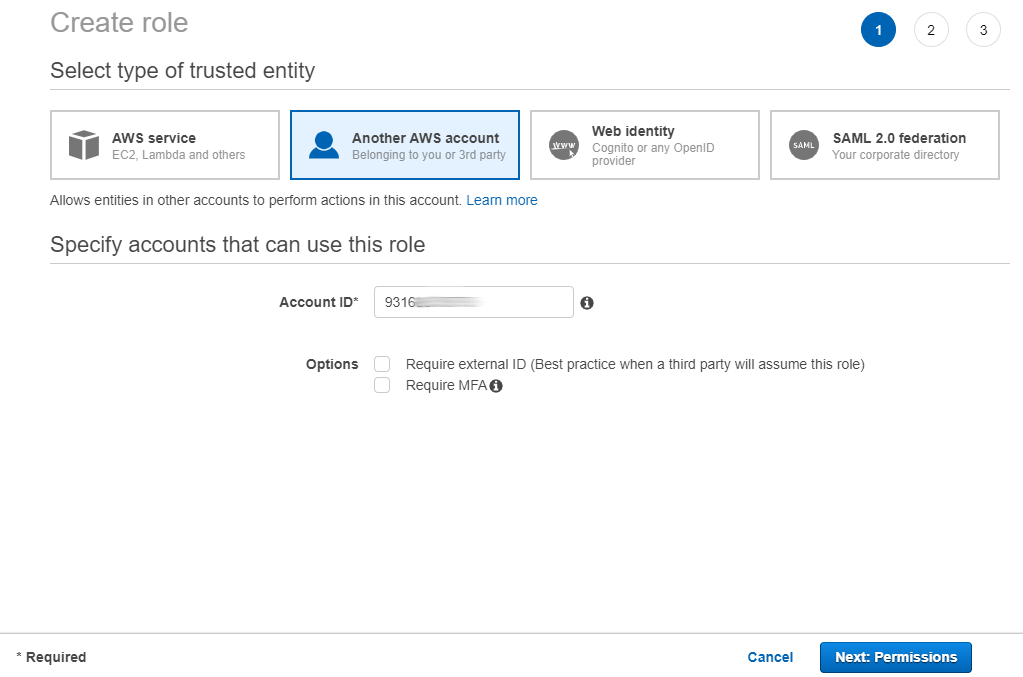
b) Go back to the IAM section in the AWS console of the account you want Hyperglance to connect to, then select 'Create Role'
c) Select 'Another AWS account', then paste in the Account ID of the account Hyperglance is running in.
d) Leave both 'Options' checkboxes unchecked, then select 'Next: Permissions'
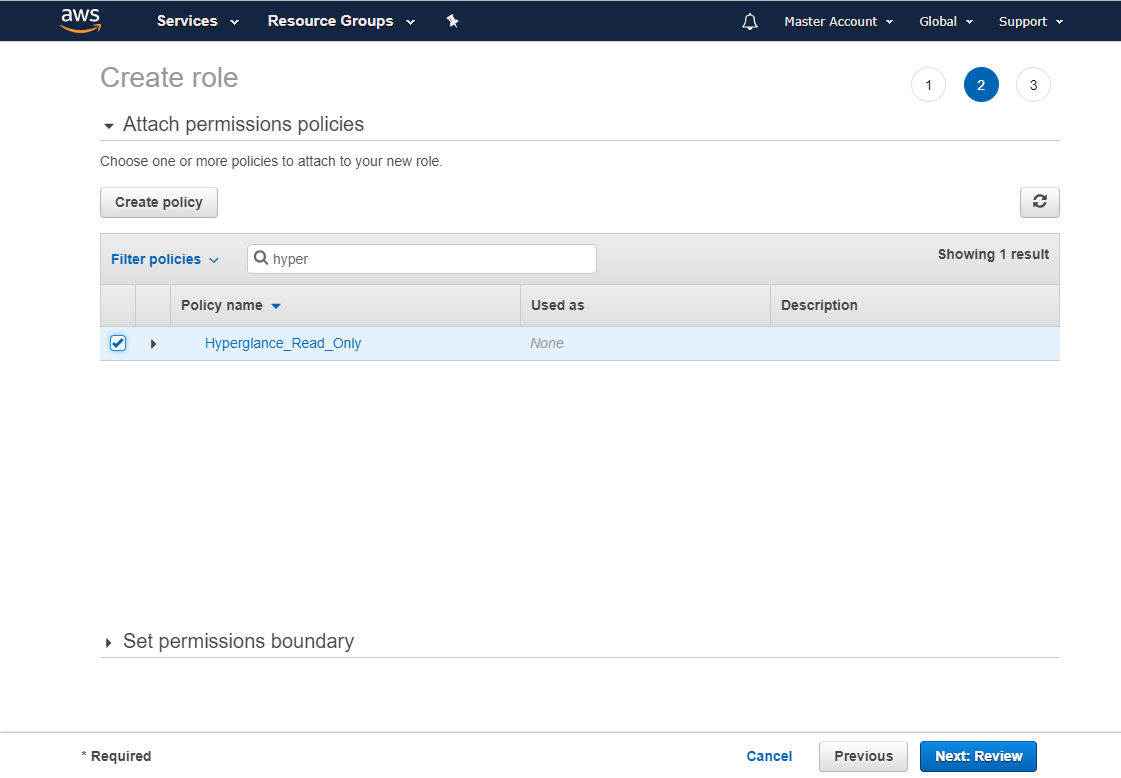
e) Find the policy you created earlier, select its tick box, and choose 'Next: Review'
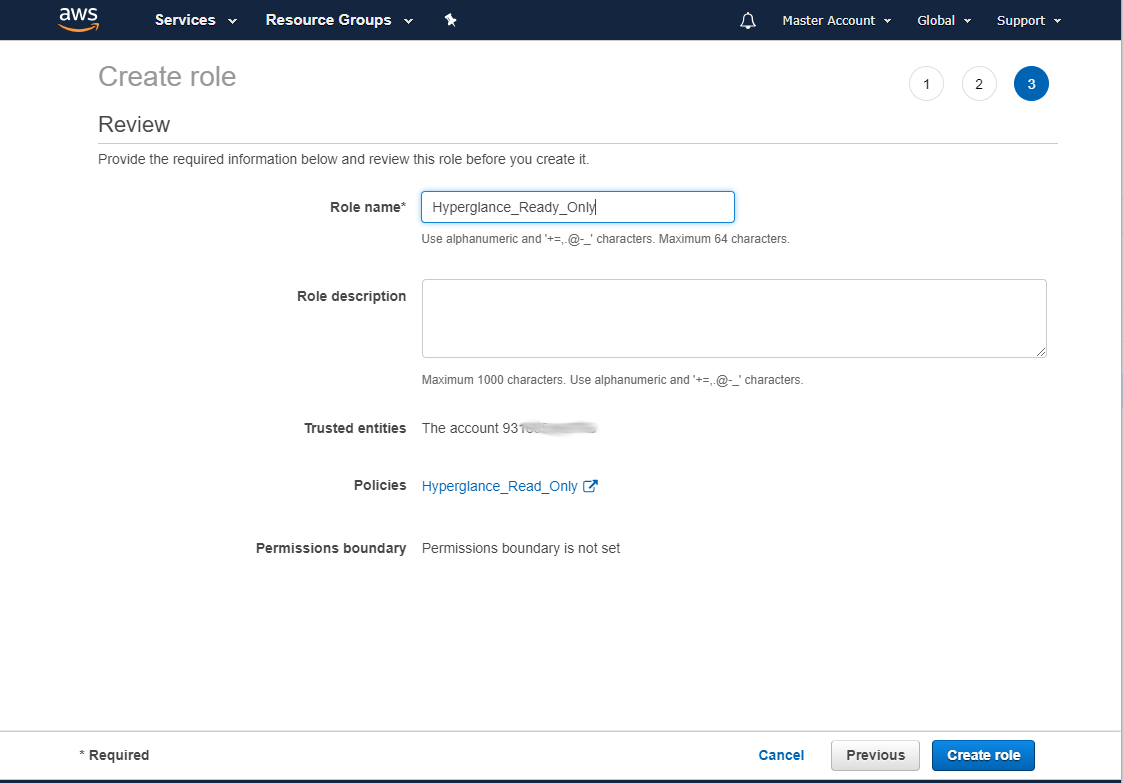
f) Name the role, then select 'Create role'
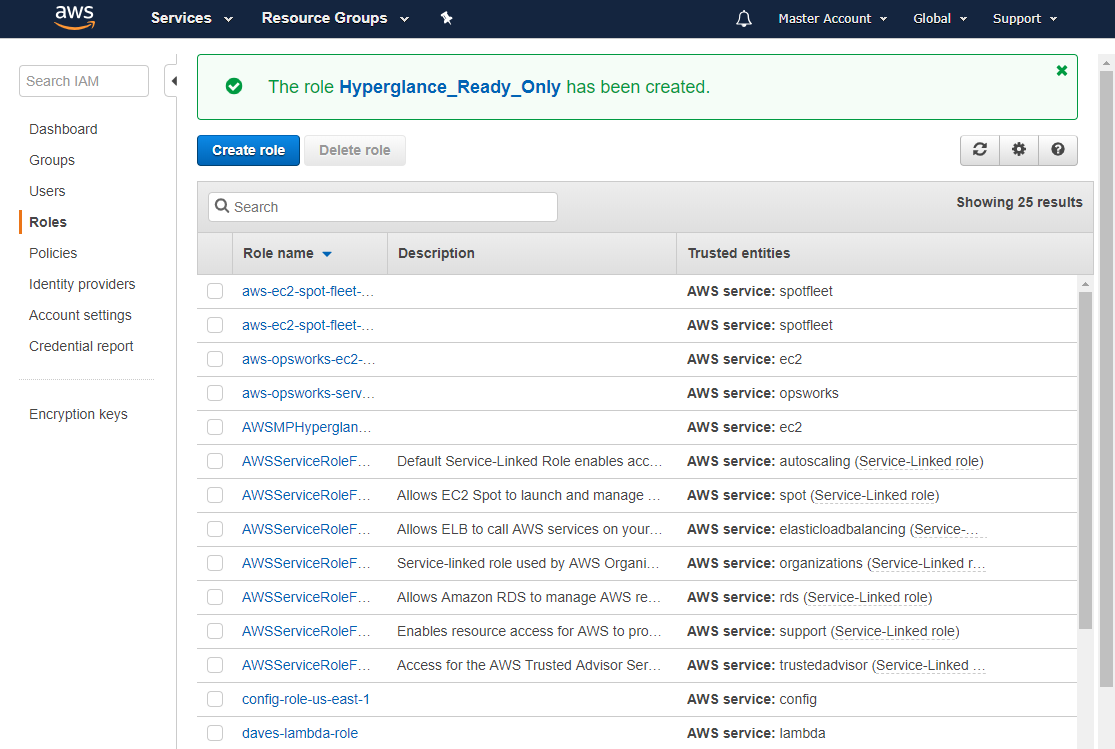
g) You will then be shown a list of all your roles. Select the role you just created.
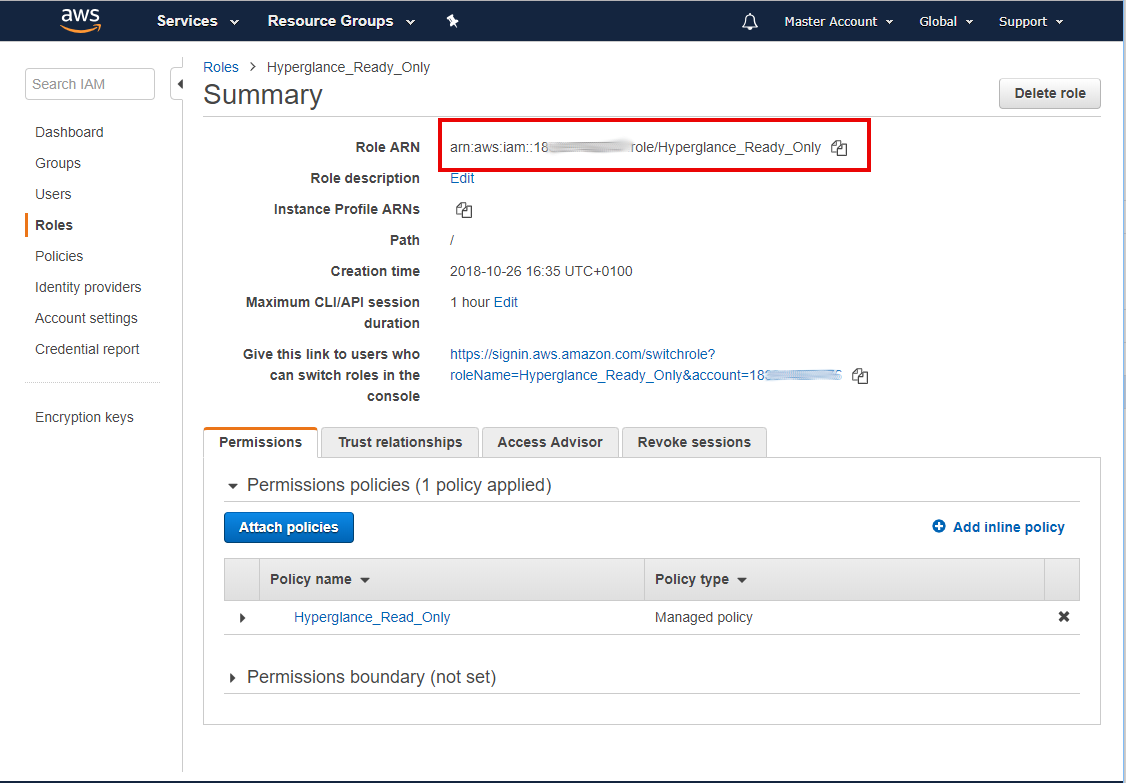
h) Copy the role's 'Role ARN'
i). Go to Settings > Platforms > Select CONNECT ACCOUNT under AWS.
j) Complete the form:
- Add in an 'Account Alias' (memorable text to name the account),
- Select Single Account
- Paste the 'Role ARN' into the Hyperglance
- Leave the Acccess Key and Secret Key blank.
- Leave "All Inventory & Billing Data" as the selected option.
- Select the regions you are interested in.
- Press 'Submit'.

Adding an account when the Hyperglance Instance is running outside of AWS
When Hyperglance runs outside of AWS you can't use AWS's IAM mechanism to allow the Hyperglance application to authenticate to the AWS API. Instead, you need to use an Access/Secret key combination.
The Steps to do this are as follows:
1. Create an IAM Policy in AWS
2. Create an AWS user and attach the policy
3. Download the Access/Secret key
4. Enter the Access/Secret key into Hyperglance
Step 1: Create a policy in the account that you would like to connect to Hyperglance
a) Head to the 'IAM' section of your AWS console
b) Visit 'Policies' then 'Create Policy'
c) Select the 'JSON' tab
d) Copy one of the JSON policies from the Hyperglance IAM requirements guide, pasting it over the existing text. You can choose a Read-Only or Read-Write policy.
e) Name the Policy and select 'Create Policy'
Step 2: Create an AWS user and attach the policy
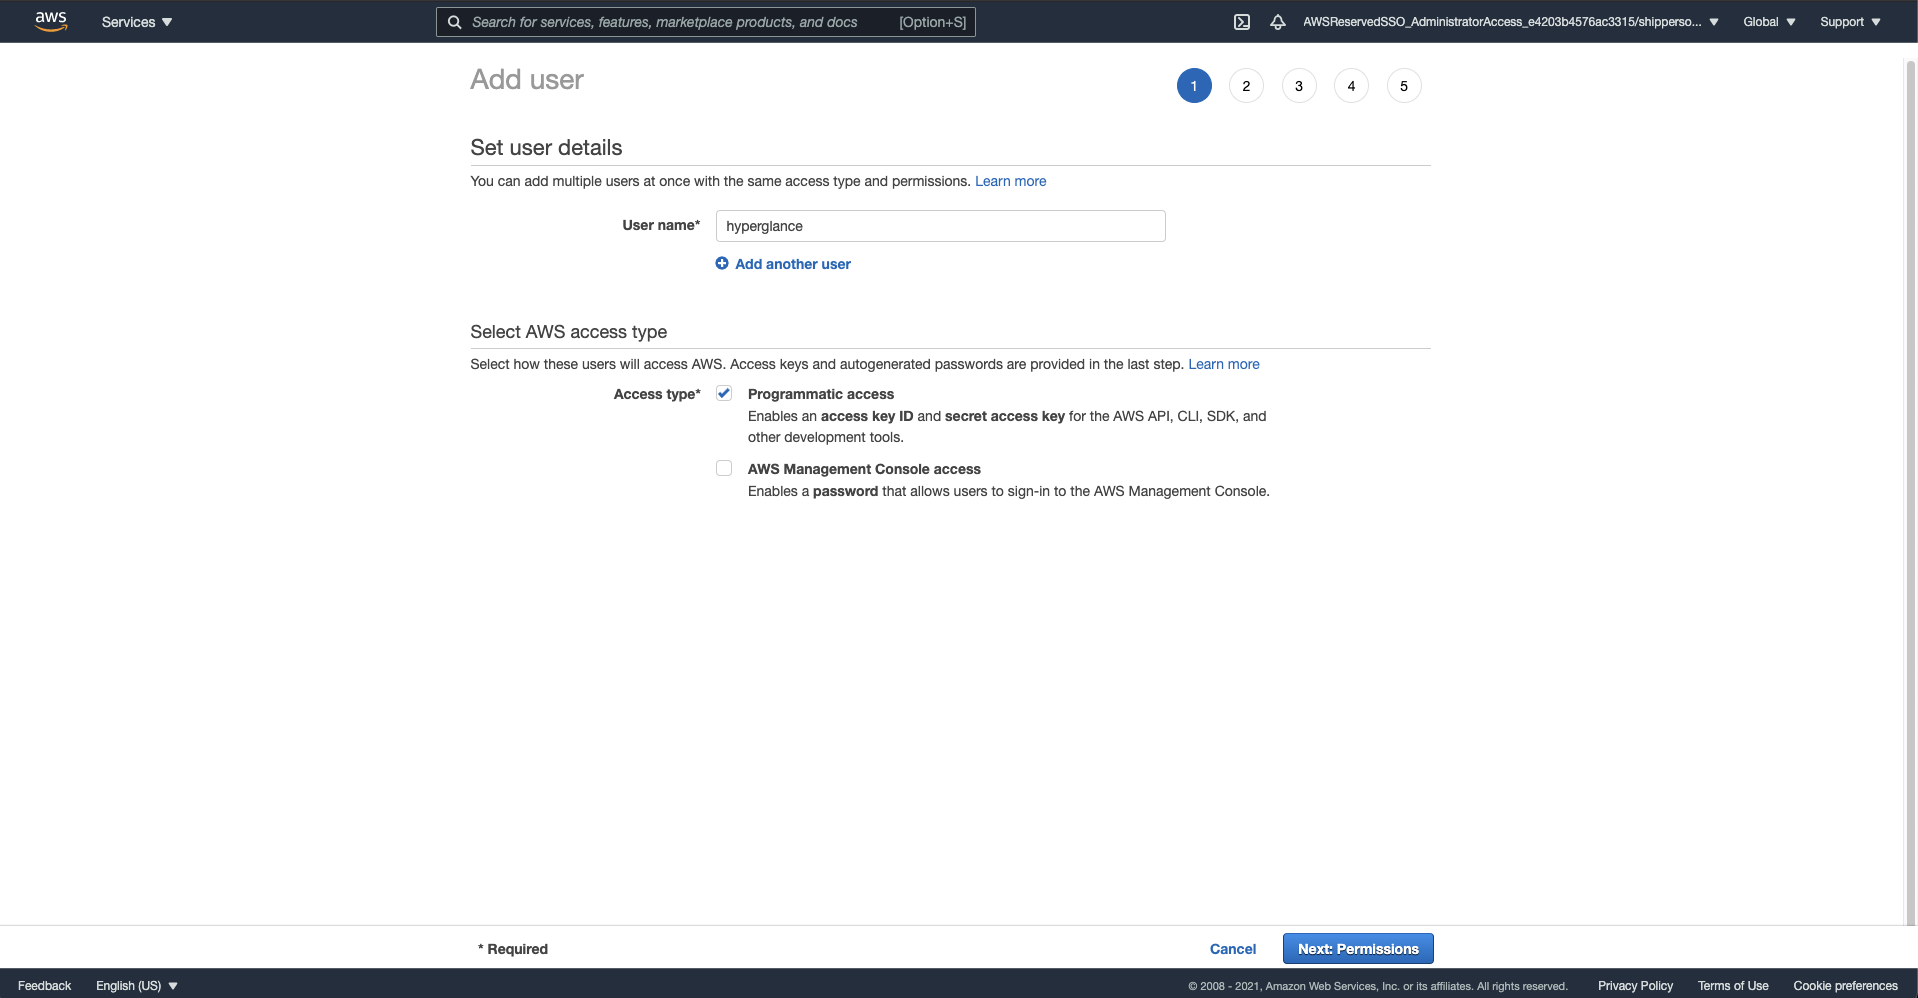
a) Go to IAM/users and select 'Add User' at the top left of the page
b) Name the user and select 'Access type, Programmatic access' and select 'Next'
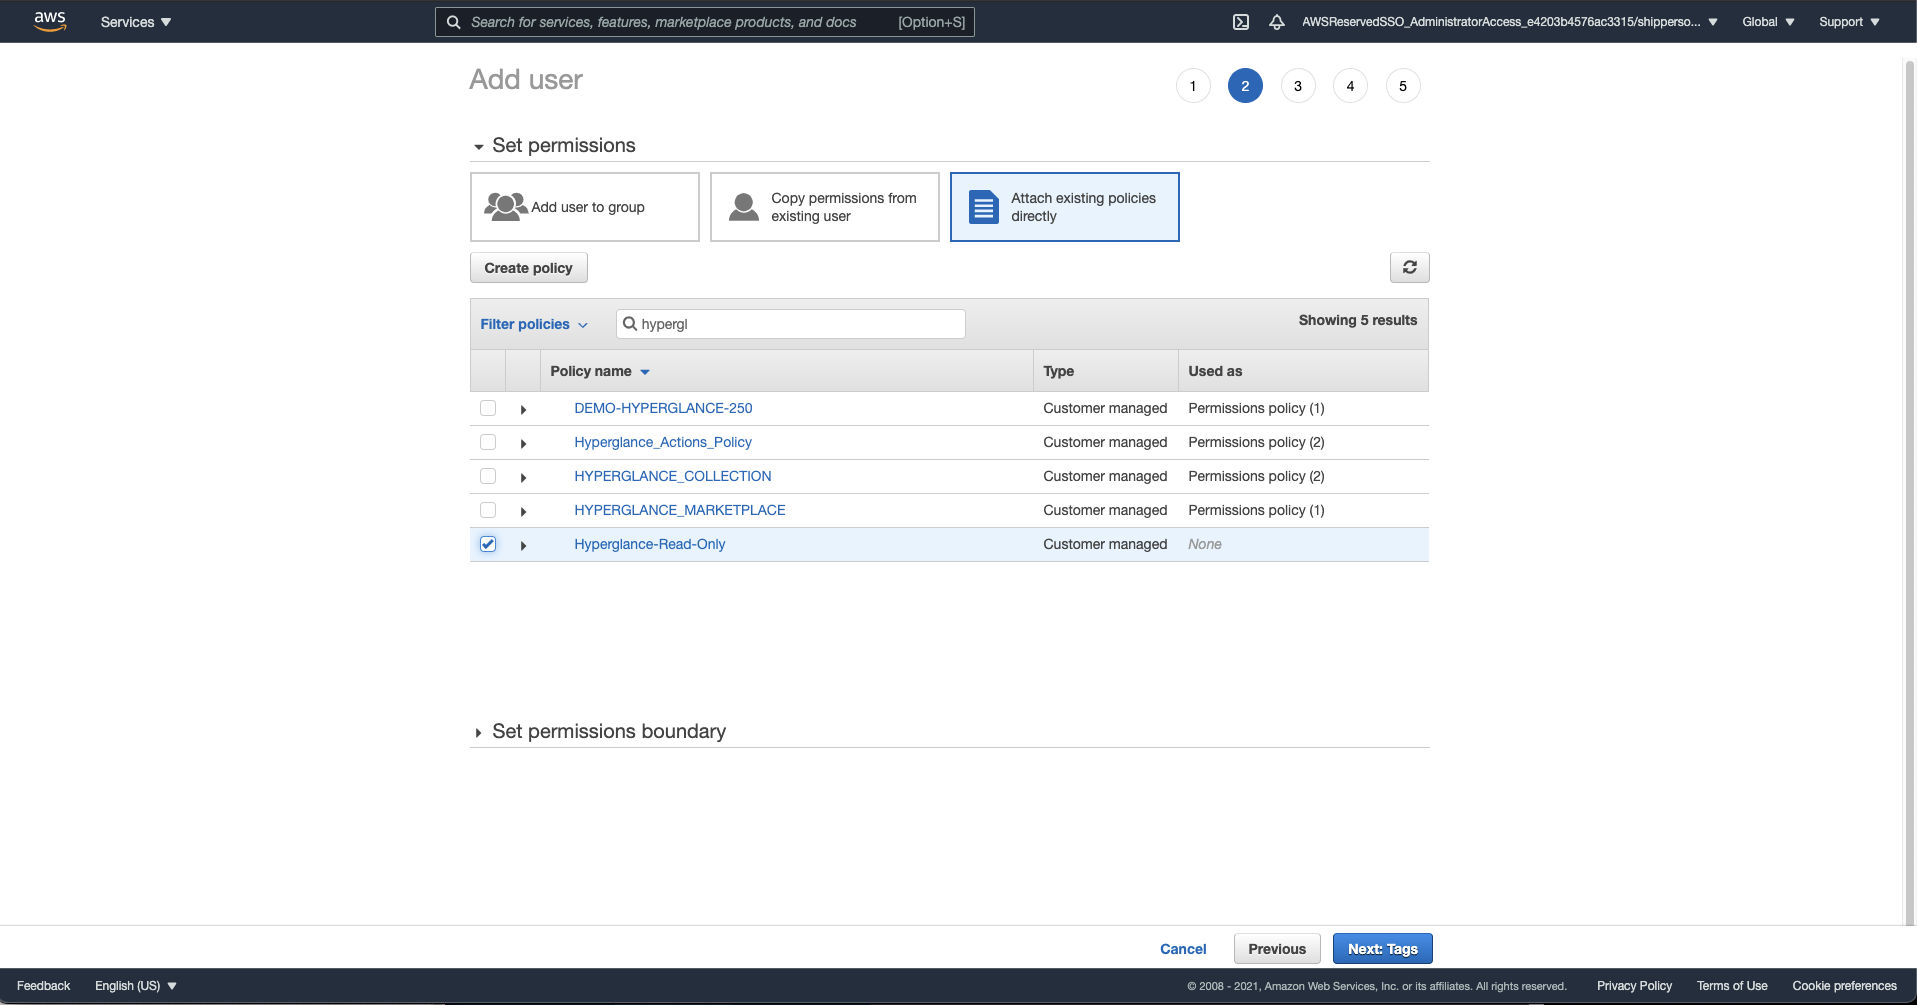
c) Select 'Attach existing policies directly', find and tick the policy you created in the previous step. Select 'Next: Tags'
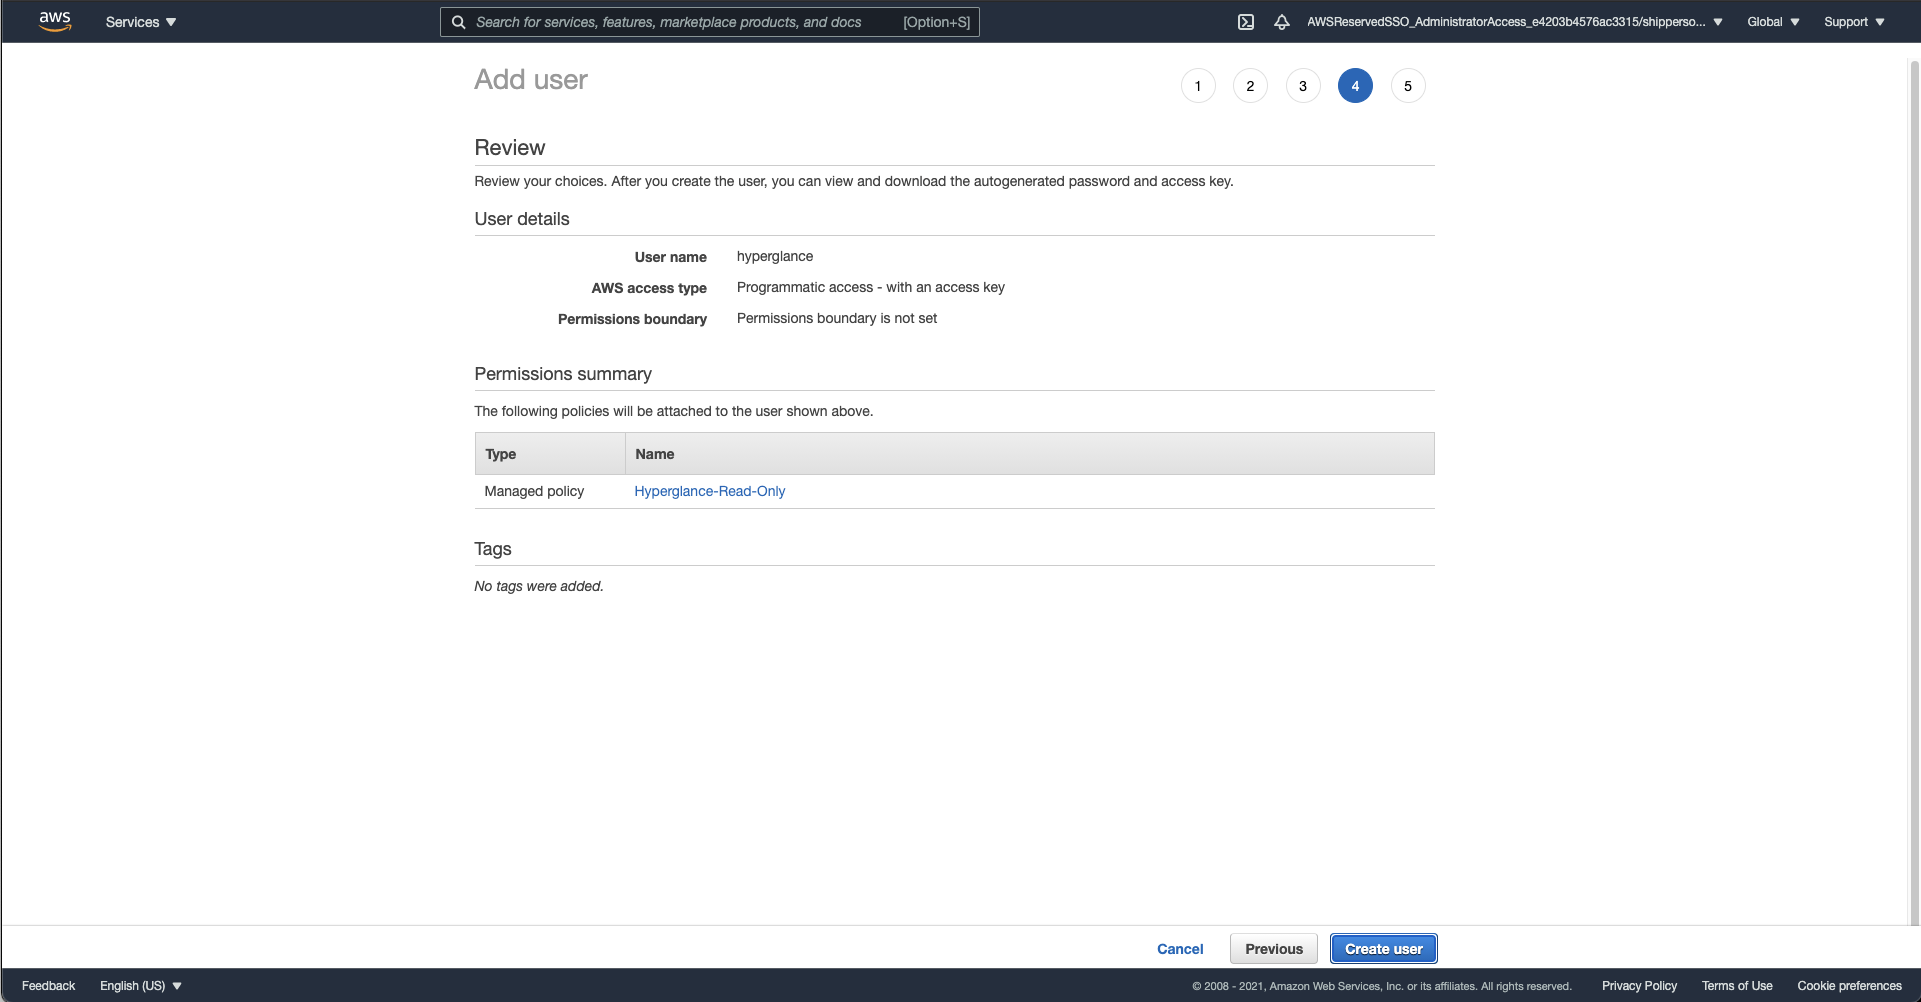
d) Add any tags you deem necessary, select 'Next: Review:
e) Select 'Create User'
Step 3: Download the Access/Secret key
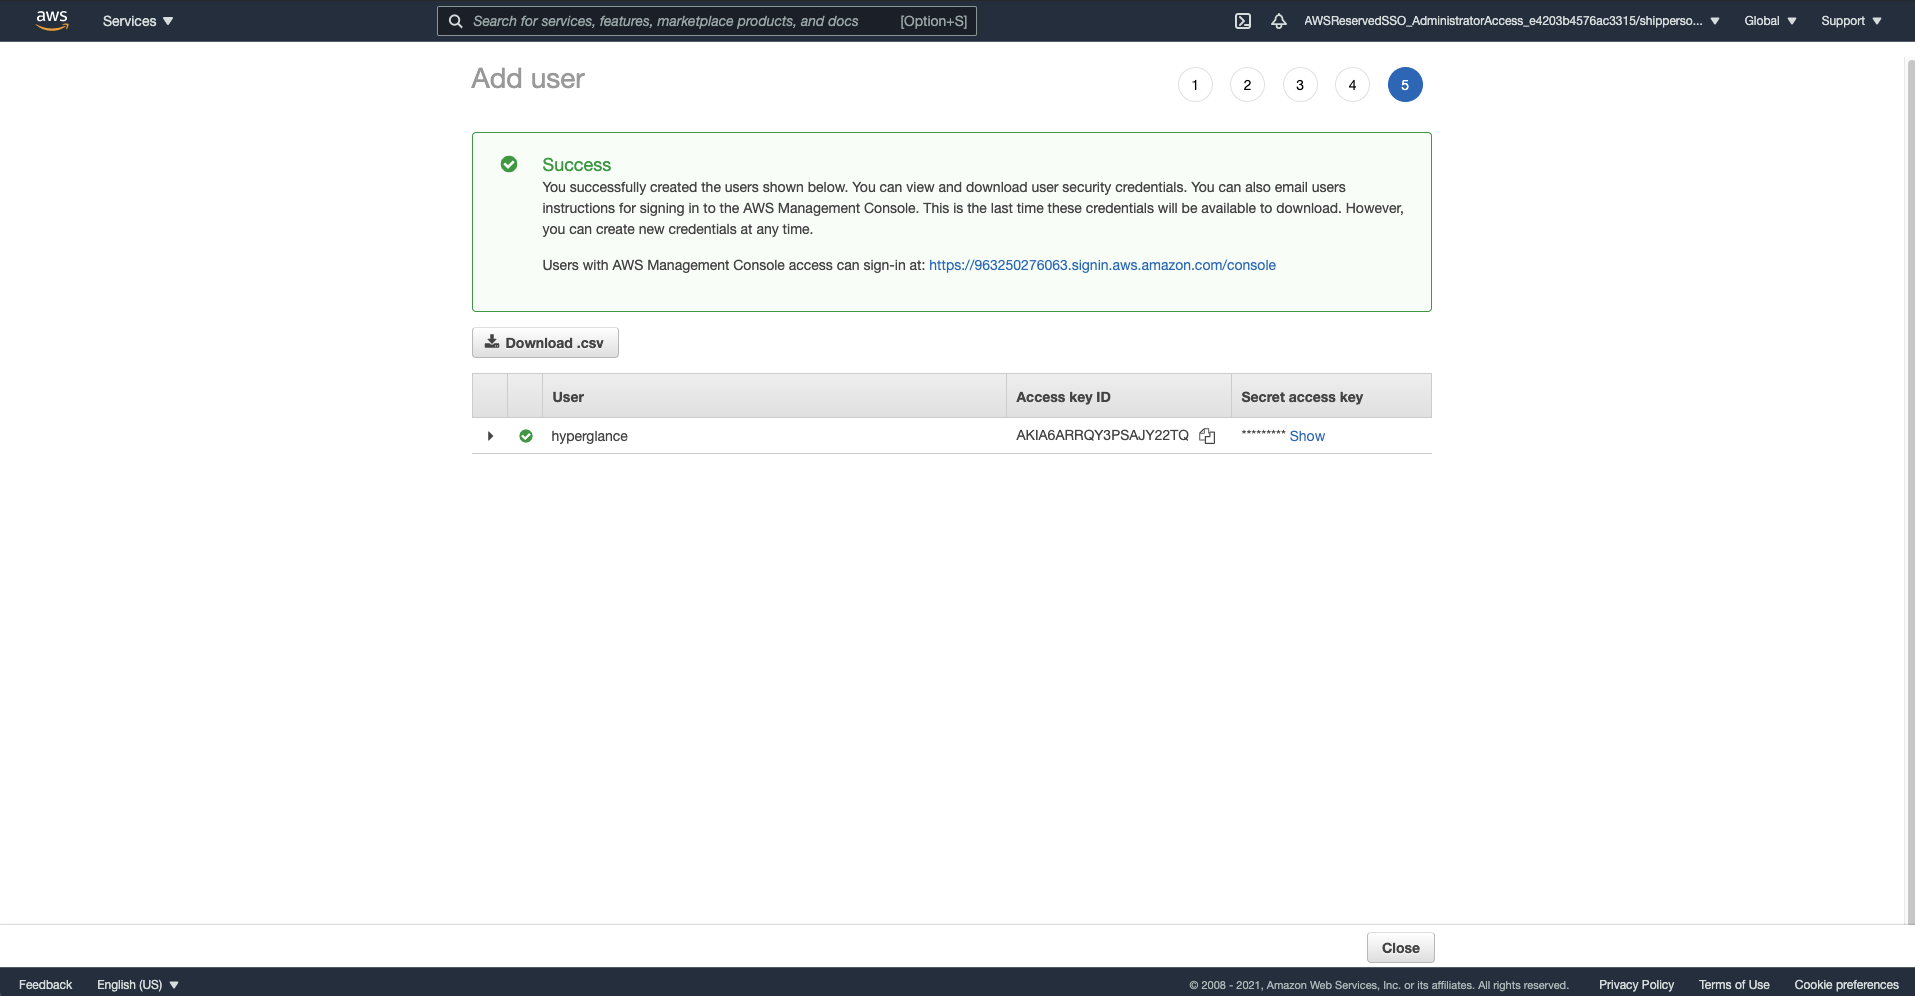
a) Select 'Download .CSV'. This will download the CSV that will have the user's Access and Secret keys you will paste into the Hyperglance
Step 4
Go to Settings > Platforms > Select CONNECT ACCOUNT under AWS.
Step 5 - Complete the form
- Add in an 'Account Alias' (memorable text to name the account),
- Select Single Account
- Leave the Role ARN blank
- Under "Other Settings"
- Paste the access key and secret key
- Leave "All Inventory & Billing Data" as the selected option.
- Select the regions you are interested in.
- Press 'Submit'.