
1. Log in to the Azure Portal, and search for Virtual Networks. Create a new Virtual Network.
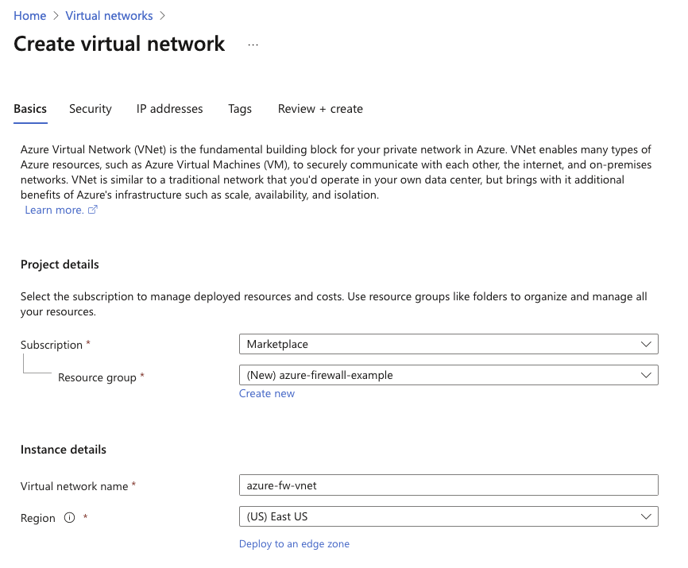
Select the subscription you wish to use, and create a new Resource Group. Also provide a Virtual network name and the region you would like to deploy to. Click next.
2. On this page, enable the Azure firewall. For this example, we will not be using Policies, and will instead use the classic firewall rules. Create a new public ip address to assign to this firewall.
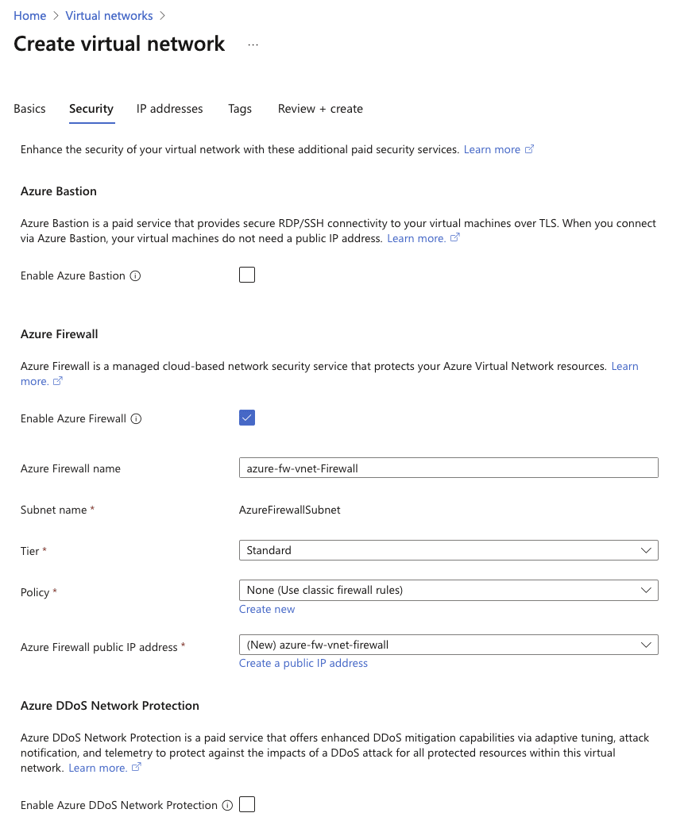
For this example, we are not enabling DDoS protection. Click next.
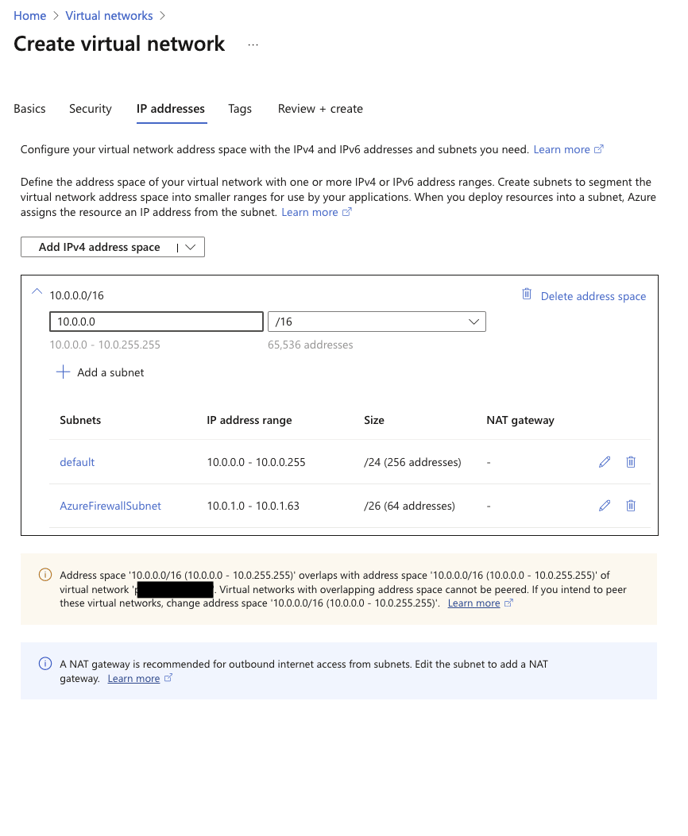
3. On the following page, define your subnets. For this example, we have left everything as default. Please note the warning at the bottom of the screenshot regarding overlapping subnets. We will not be implementing any peering, so can safely ignore this warning in this instance.
4. Deploy your Hyperglance instance using one of our Marketplace images. Please refer to the following guide for further information. https://support.hyperglance.com/knowledge/getting-started-in-the-azure-marketplace-with-hyperglance
Please note, when defining the VM configuration, we will be using the same resource group we created the VNET in. Ensure that the Hyperglance instance is deployed into the the "default" subnet we created in the earlier steps. Set Public IP to none, NIC networking security group to Basic and Public inbound ports to None.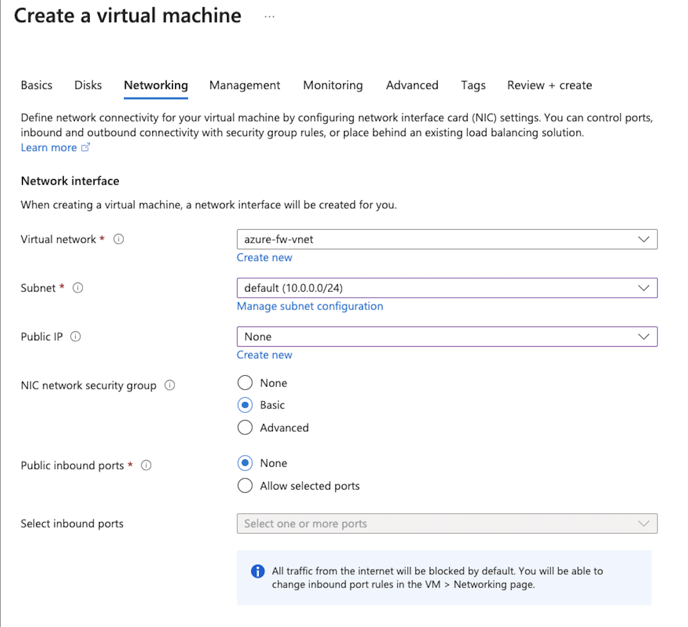
5. Wait for the Virtual Machine resources to be deployed. Once these are active, locate the Resource Group created for this example, and select the Network Interface associated with the new Virtual Machine, then select IP Configurations, and finally the IP Configuration. From this screen, set the Private IP address settings -> Allocation to Static and click Save. Make a note of this ip address as well will need it shortly.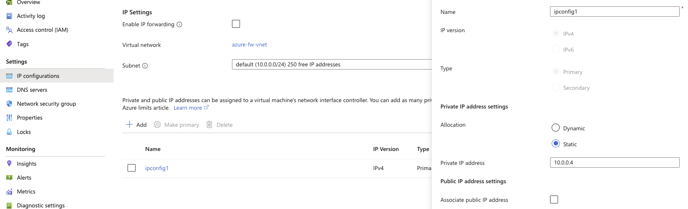
6. Return to the resource group, locate and make a note of the public ip address assigned to the firewall.
7. From the resource group, select the firewall, then Rules (classic). Select Add NAT Rule Collection
8. Create 2 new firewall rules to allow access to the Hyperglance instance on ports 22 and 443. Below is an example for SSH (port 22)
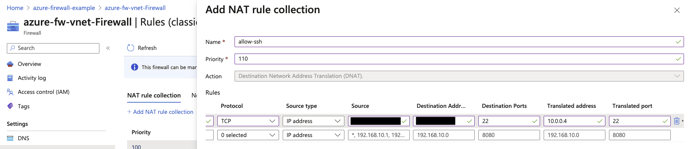
| Protocol | TCP |
| Source Type | IP Address |
| Source | This should be the public IP address of the source you want to allow access to Hyperglance from. |
| Destination Address | This should be set to the PUBLIC ip address of the firewall |
| Destination Ports | 22 |
| Translated Address | This should be set to the Private IP Address of Hyperglance |
| Translated Port | 22 |
9. Save the rules. You should now be able to access the Hyperglance webui on the firewalls public ip address using https://firewallpublicip.
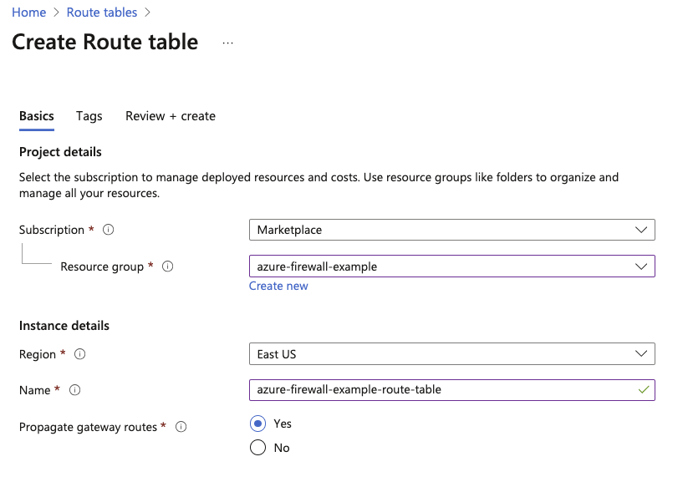
10. Next, search for "Route Tables" on the Azure portal, and create a new route table in the same resource group.
11. Once the route table is created, find the resource group, and locate the route table, then Routes, and create a new route as shown below.
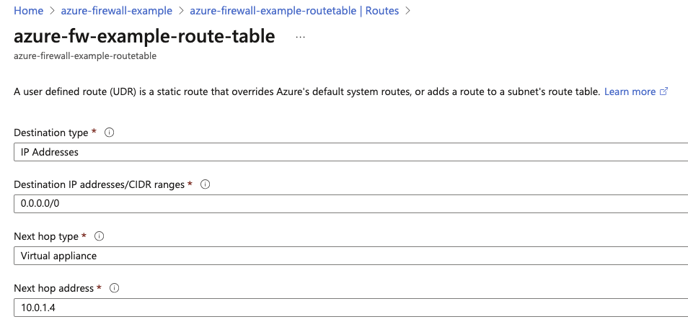
The Next hop address should point to the Azure Firewalls internal IP address.
12. Within the same route table, select Subnets on the sidebar, and Associate the route table with the subnet that the Hyperglance instance resides in.
13. We can now return to the Azure Firewall page in the resource group and click on Rules (classic). Next, as an example, we will allow all access to the internet from the subnet. This can be accomplished by creating a new Network rule collection. Use this option for limiting access to ip addresses/ranges. Below is a allow-all-out example
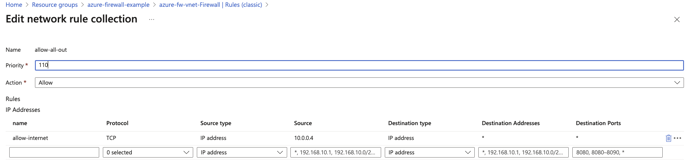
Note that in this example, we are limiting the source address to the Hyperglance instances private ip address. This could be modified to allow access from the entire subnet. Click save when done.
13. If you now SSH into the Hyperglance instance, you can run the following command:
curl ipv4.icanhazip.com
This should return the public ip address assigned to the Azure Firewall.
Please note. This is a pretty broad allow rule. If you wanted to tighten the network security further, you would limit access to only addresses/urls that the Hyperglance instance needs to connect to, for example Azure.