Rules: A complete guide
Find out what Hyperglance rules are, and how you can use them to monitor your cloud setup
In this article, you'll learn:
Hyperglance Rules
In Hyperglance, a Rule is an advanced search query that you can save, run continually, and use to automatically notify you and/or run automation actions if/when something is wrong.
Hyperglance comes preloaded with over 160 rules, all designed to ensure your cloud setup meets best practices.
In addition to the 160+ preloaded rules, you can create your own rules to implement your company's own policies and processes:
- Search for resources using any attribute and unlimited conditions
- Save your search query as a rule, giving it a name, description and label
- Set how often you'd like your rule to run, and its thresholds/triggers
- Choose how you'd like to be notified when the rule triggers (email, Slack webhook, AWS SNS, Azure Event Grid)
- Run automation actions when the rule triggers
Viewing Rules
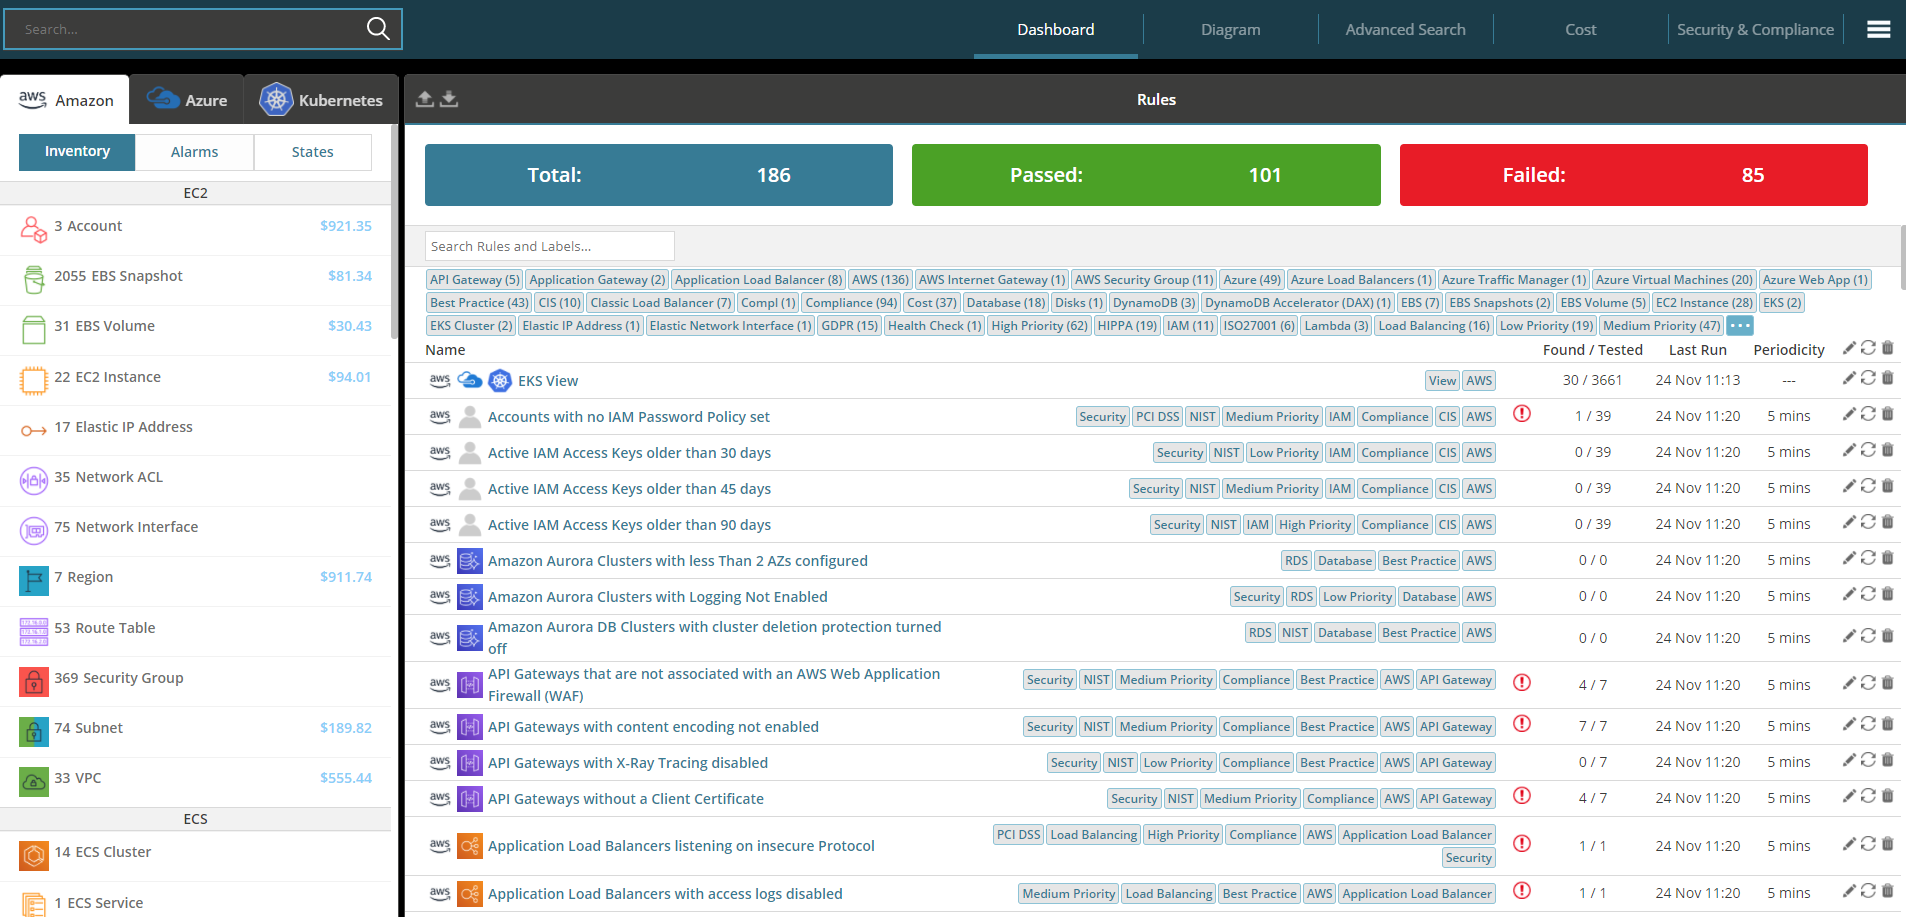
When you log in to Hyperglance, you can see all your rules on your dashboard:
From this view, you can quickly:
- See how many rules you have in total
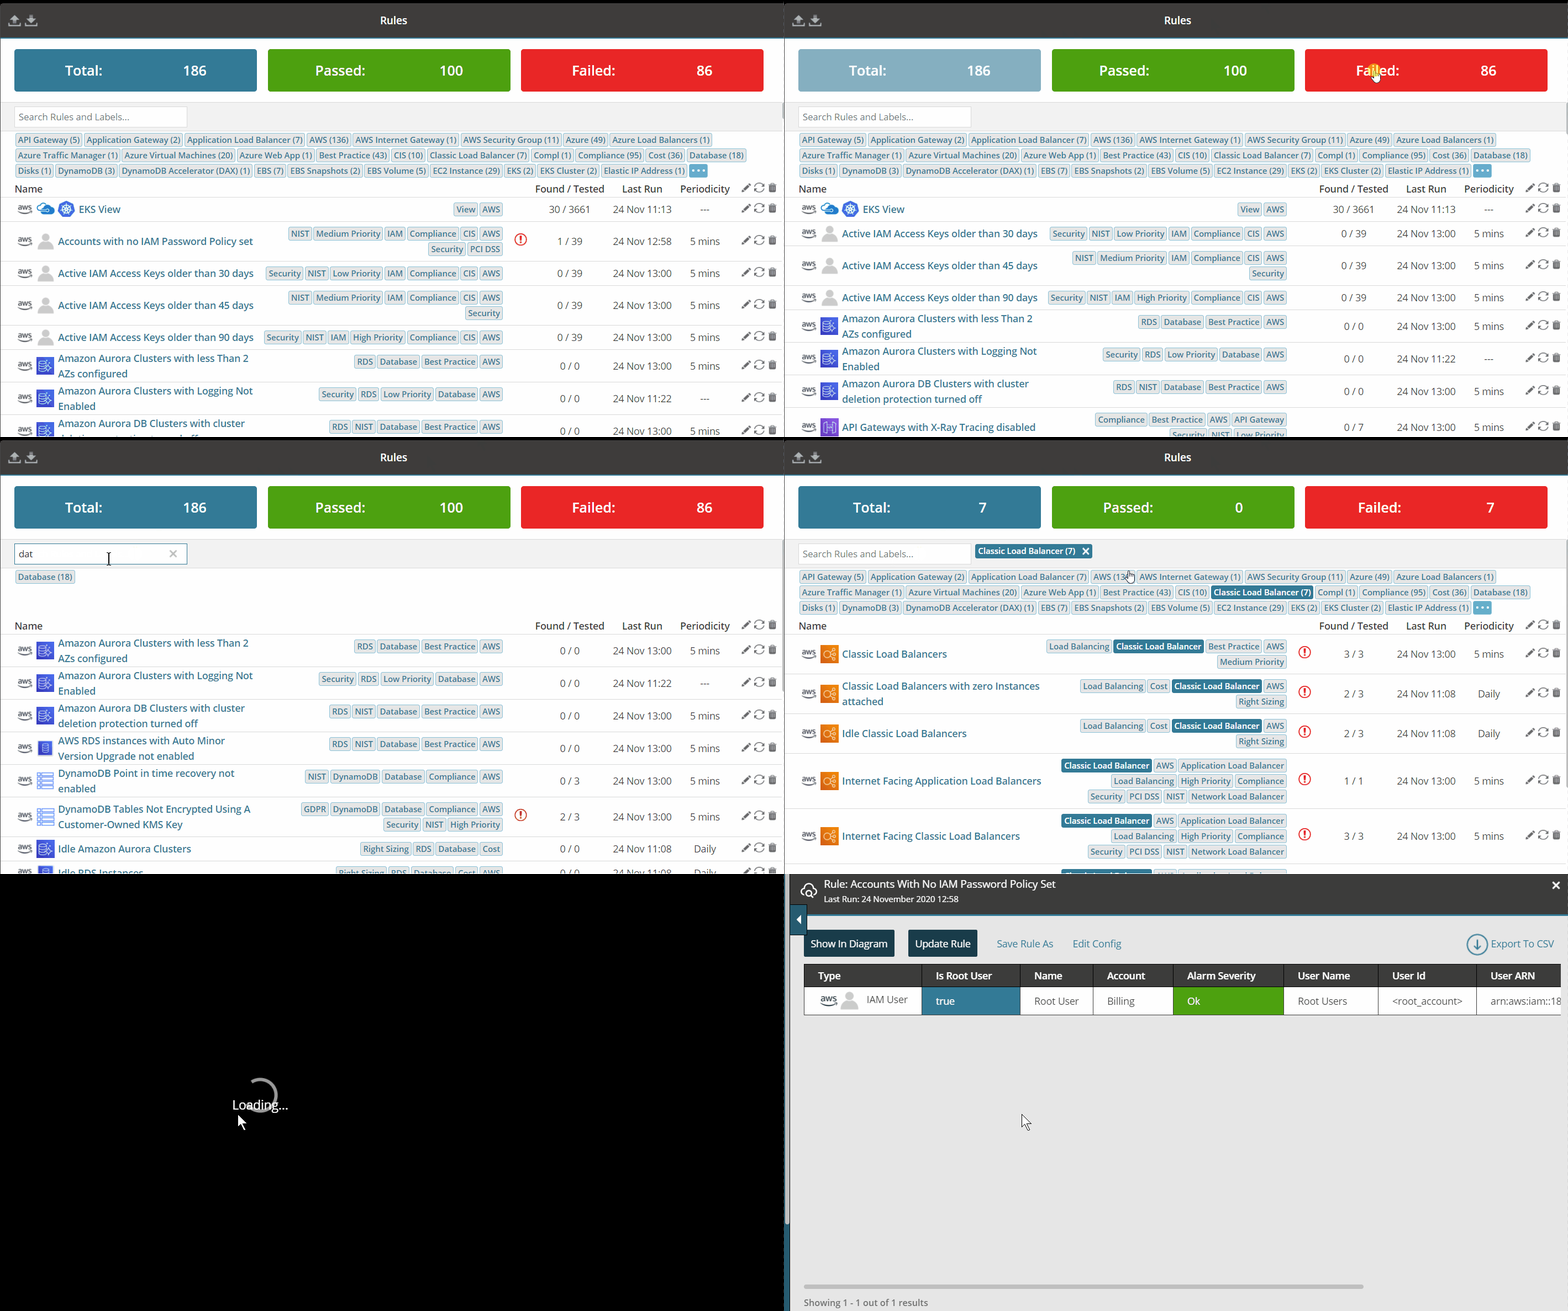
- Filter by rule status (passed/failed)
- Filter by label or a string of text
- Hover over a rule's name to see its search criteria
- Select a rule to see its detailed view, including its search criteria and results
From the same view, you're also able to quickly carry out some key tasks by using the controls on the right-hand side.
These can be done on a rule-by-rule basis (icons located in the row), or in bulk against all the rules you have visible based on your filters (icons located in the column header).
| ICON | EXPLANATION |
 |
Edit a rule, or bulk-edit all your visible rules |
 |
Manually run a rule, or bulk-run all your visible rules |
 |
Delete a rule, or bulk-delete all your visible rules |
Creating Rules
1. Head over to Advanced Search
2. In the left-hand side, enter the search criteria that identify the resources that you want to monitor, adding as many conditions as you like
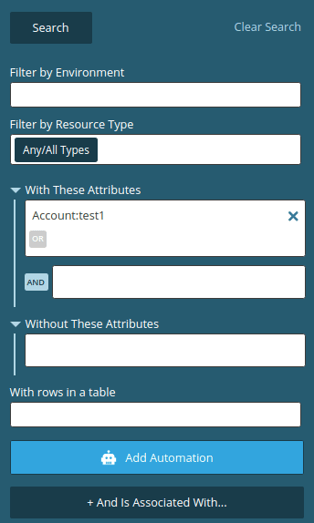
To get the most from Advanced Search, we'd recommend reading this guide
3. Click on 'Add Automation' if you wish to run automated actions whenever the rule runs.
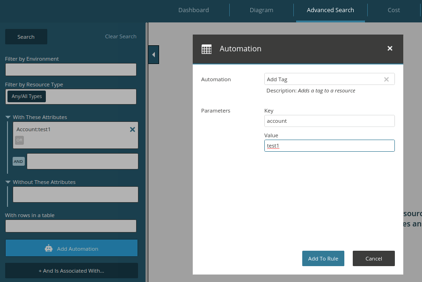
4. Once you've entered your criteria and filled out your automated actions, select 'Search'. Your results will appear in the table to the right-hand side of your search criteria.
5. When you're happy with the search criteria, you can save them as a rule by selecting 'Save As Rule'.

6. Configure how your rule should behave:
- Name: A short description of your rule
- Description: An (optional) detailed description of your rule
- Labels: Categorise your rule by adding an existing label, or creating a new label.
- Notifications & Automations: Enable if you wish to receive notifications and run the automations whenever the rule runs.
- Run Schedule: Configuration for when the rule should run
- Repeat Timer: Configure the rule to run every x minutes
- Daily Scheduler: Configure the rule to run every x day/s of the week at x hour of the day
- Trigger: Criteria for the alerting and automation whenever the rule runs
- Every Time This Rule Runs: Sends notifications and runs configured automation actions each time this rule runs
- Every Time Results Are Found: Sends notifications and runs configured automation actions only when there are failed results found at each run
- Once When This Rule Begins Alerting: Sends notifications and runs configured automation actions only once, at the very first time there are failed results found
- Once When This Rule Begins Alerting And Again When It Stops Alerting: Sends notifications and runs configured automation actions once, at the very first time there are failed results found, and again when there are no more failed results found.
- Run Schedule: Configuration for when the rule should run
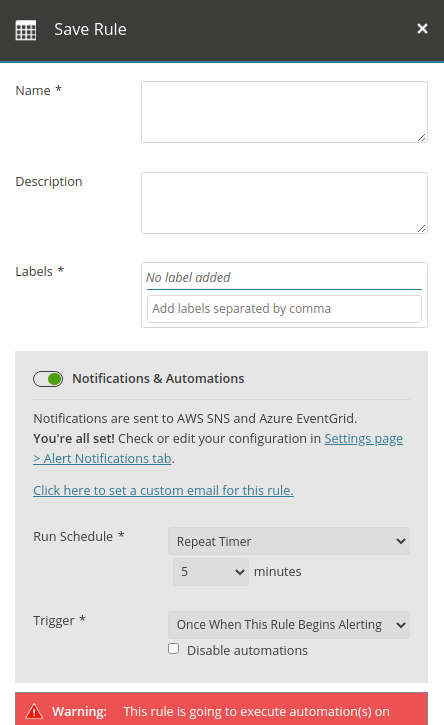
If you don't enter any notification options/methods, your rule will still run and its status will be visible inside Hyperglance.
7. Once you're happy with your rule settings, select 'Submit' to save your rule!
Editing Rules
To edit a rule's name, labels, schedule, or notification settings:
- Select to edit (the pencil icon) a rule from your dashboard. This will load the edit rule view.
- Make your changes
- Select 'Submit' to save your rule changes
To edit the underlying search criteria of a custom rule:
- Select the rule from your dashboard. This will take you to the Advanced Search detail view.
- Edit your search criteria and 'Search' to show the updated results
- When you're happy with the updated criteria, select 'Update Rule' to save your changes
There are some other useful options to choose from here:
- Show in Diagram: View at your search results in a contextual diagram
- Save Rule As: Use this to save a new copy of a rule, particularly useful if you want to tweak the criteria of a 'read-only' preloaded rule that cannot be edited
- Edit Config: Use this to edit a rule's name, labels, schedule, or notification settings
- Export to CSV: Use this to export your search results as a CSV file
Adding Exceptions to Rules
Perhaps a rule matches resources that you decide should not be flagged up by a rule. You can easily select that resource and add it as an exception:
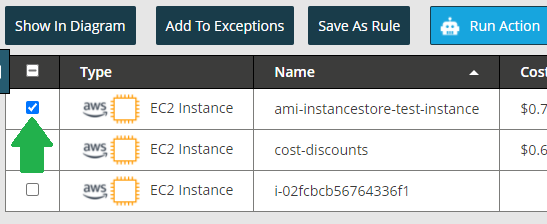
1) Select any resources you wish to add as exceptions:
2) Click Add As Exceptions:
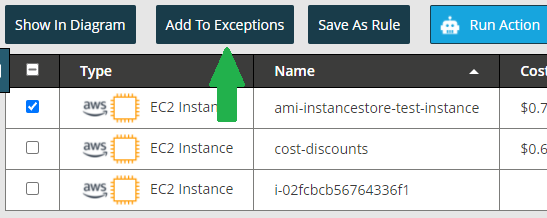
A pop up will be displayed. Users can add notes against the entities that are being added.
Click save to add to the exceptions list.

The search will refresh and the selected resource(s) will no longer be included in the results.
Managing & Reviewing Exceptions
You can review and manage your exceptions on any rule. Simply open the rule and at the top, there is a link to click:

Which opens the exceptions manage dialog:

Export & Import Rules
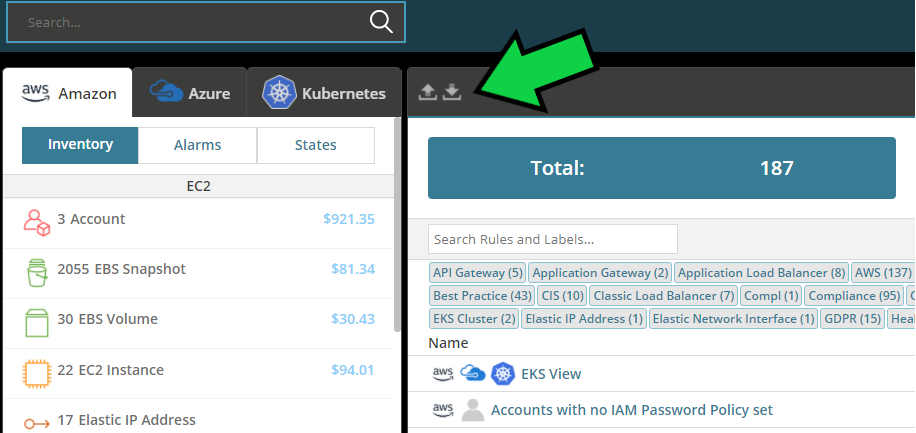
If you're running more than one instance of Hyperglance, you can keep your rules in synch by exporting and importing them from one instance to another.
We're always adding more rules to Hyperglance. To get the latest updates, make sure you update your install.


