
If you are running on our legacy Docker-based architecture, see legacy guide.
How To Set Up SSO With SAML for Azure Entra ID
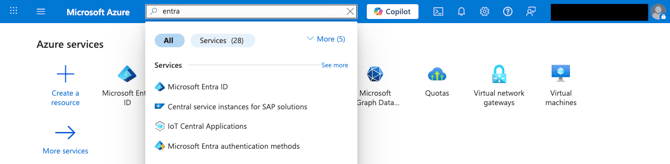
1. Log in to the Azure Portal and search for Microsoft Entra ID
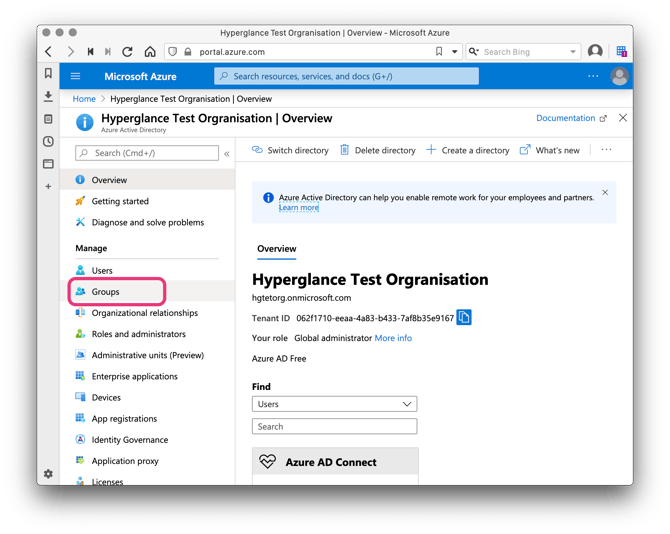
2. Start with configuring groups, these will be associated with Hyperglance Roles at a later stage. Select Groups:
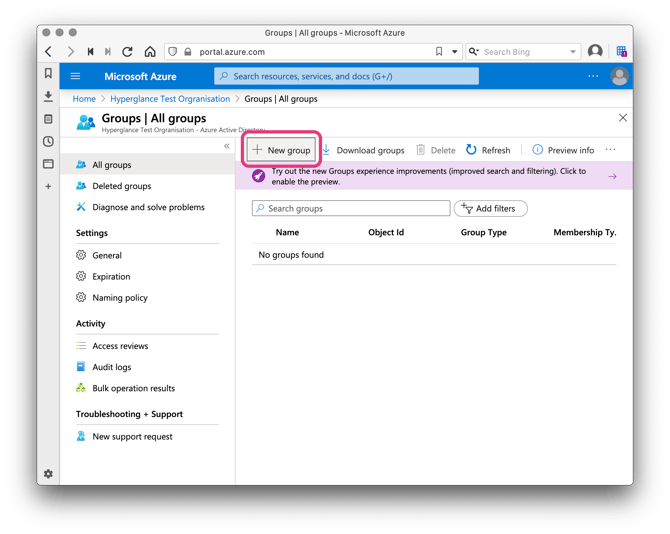
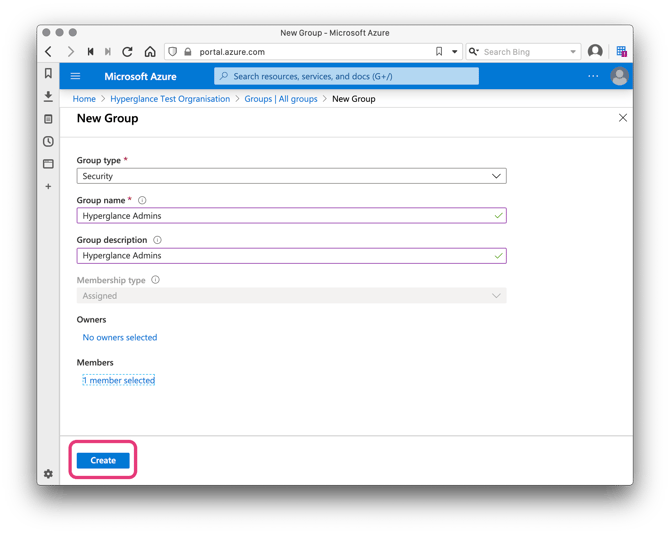
3. Click New Group and let's call this group Hyperglance Admins.
Refer to our Role-Based Access-Control (RBAC) Documentation to learn about other kinds of user besides admins.
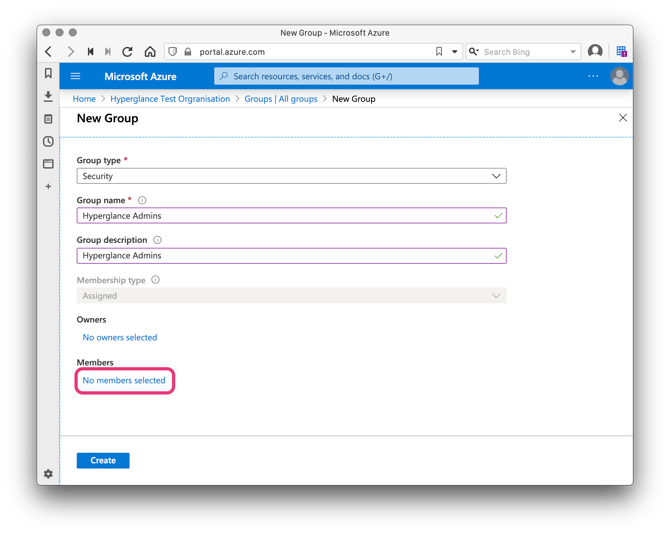
4. Add members to your group by clicking No members selected and then selecting some users:
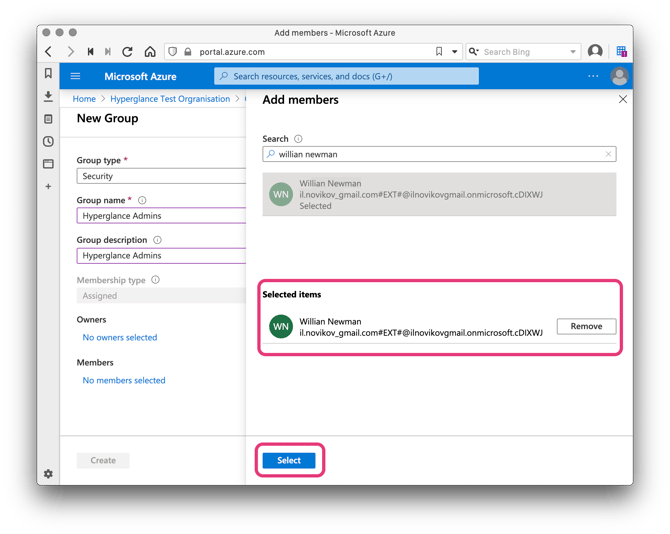
5. Click Create:
Repeat the previous steps to create additional groups for other Hyperglance Roles if needed. For the list of Roles supported by Hyperglance please refer to the document describing Role-Based Access-Control (RBAC) used in Hyperglance
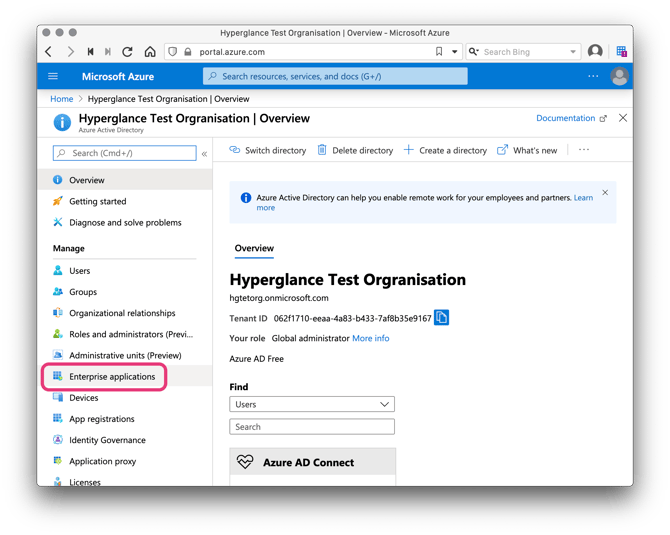
6. In Entra ID select Enterprise applications:
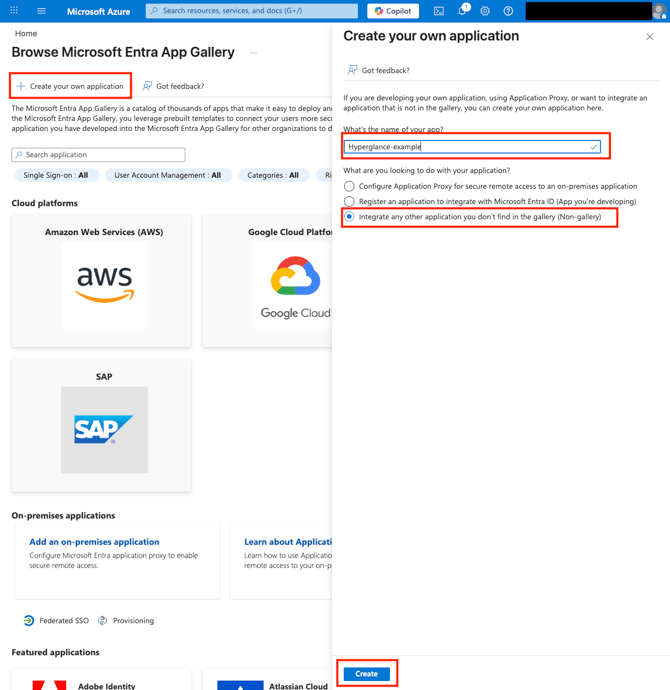
7. Click Create your own application. Give the application a name, select Integrate any other application you dont find in the gallery (Non-gallery), and then final Create.
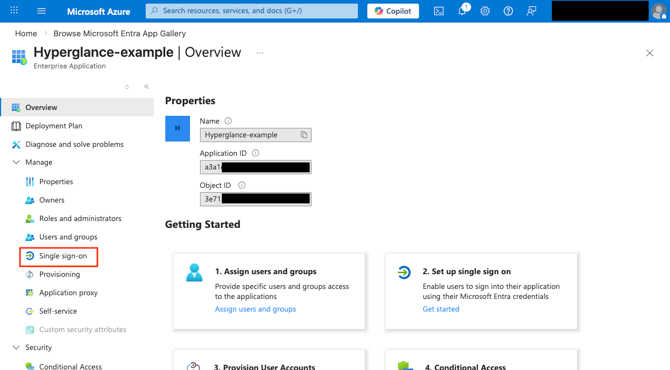
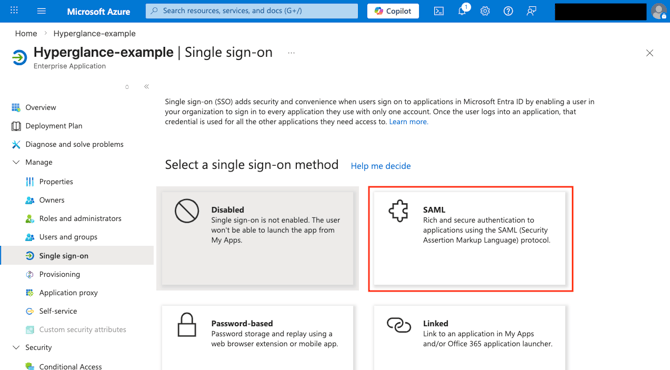
8. From the left side Select Single sign-on and pick the SAML option presented:
9. On the VM, generate Service Provider (SP) metadata by running the command
sudo hg saml new --endpoint-url https://18.206.76.67 --entity-id https://18.206.76.67/saml
Be sure to adjust the IP address as appropriate for your setup:
The parameterendpoint-url: The URL to the SAML endpoint for your Hyperglance VM. Must be set to: https://{yourHyperglanceVM}/saml
The parameter entity-id: The SAML Entity ID - This can be any URI that uniquely identifies your Hyperglance install, using the IP address is a good way to do that.
The IP address or DNS name you use here must be the one that your browser would use to reach the Hyperglance VM because SAML works using browser redirects!
If the script was successful you will see an output like this:
ec2-user@ip-10-0-2-43:~$ sudo hg saml new --endpoint-url https://18.206.76.67 --entity-id  https://18.206.76.67/saml
[INFO] Generating initial SAML configuration files.
[INFO] New saml configurations written to: /var/lib/data/hyperglance_helm_charts/saml
[INFO] A corresponding idp.xml needs to be provided at /var/lib/data/hyperglance_helm_charts/saml/idp.xml
[INFO] For more information, please visit our support site at https://support.hyperglance.com/knowledge/saml-support-in-hyperglance
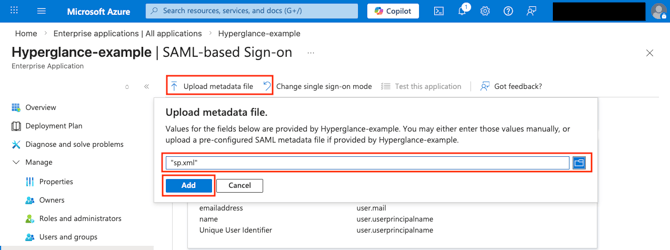
The script has generated an sp.xml file. We will need to use these in the next steps. This file can be located at /var/lib/data/hyperglance_helm_charts/saml/sp.xml
12. Upload the sp.xml file from the VM to the Azure portal using the "Upload metadata file" option:
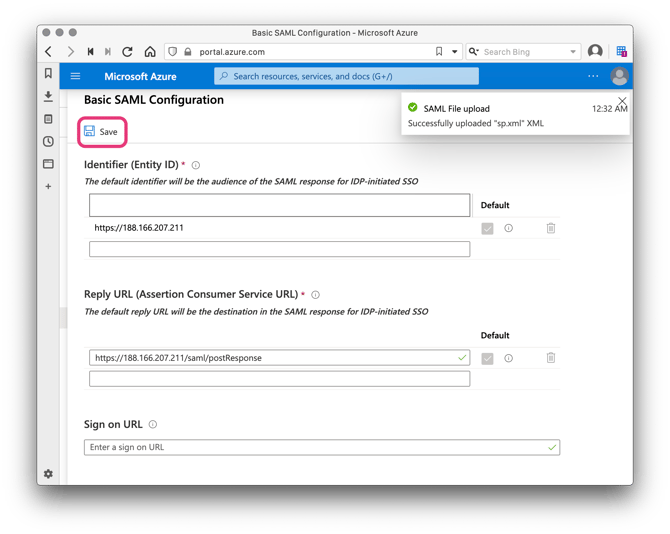
10. After the upload it should have populated the Entity ID and the Reply URL. No other changes are needed so just click Save and close the form:

11. Replace the empty idp.xml file on the VM with the Federation Metadata XML you can download from the Sign sign-on page in the Azure portal:
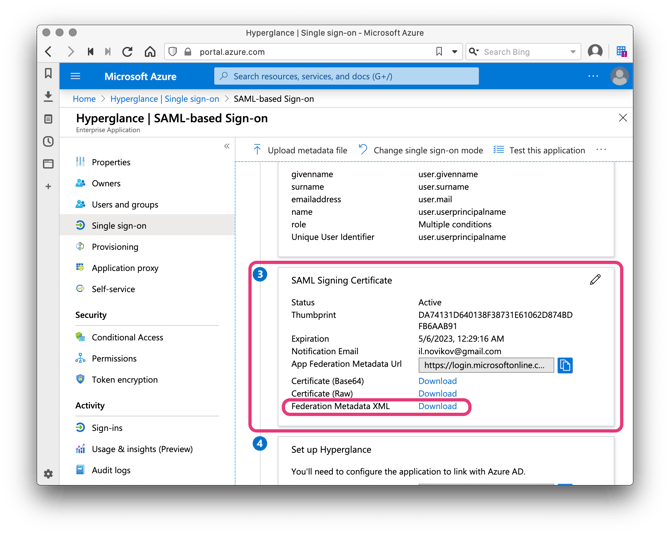
12. Rename the Federation Metadata XML file to idp.xml, and copy it to your hyperglance instance at /var/lib/data/hyperglance_helm_charts/saml/idp.xml
13. Run the command sudo hg saml generate-values. A successful will output the following:
ec2-user@ip-10-0-2-43:~$ sudo hg saml generate-values
[INFO] Generating updated values.yaml with injected SAML values.
[INFO] Updated values.yaml written to: /var/lib/data/hyperglance_helm_charts/values.yaml
[INFO] Please run `sudo hg apply-config` to activate your new SAML configuration.
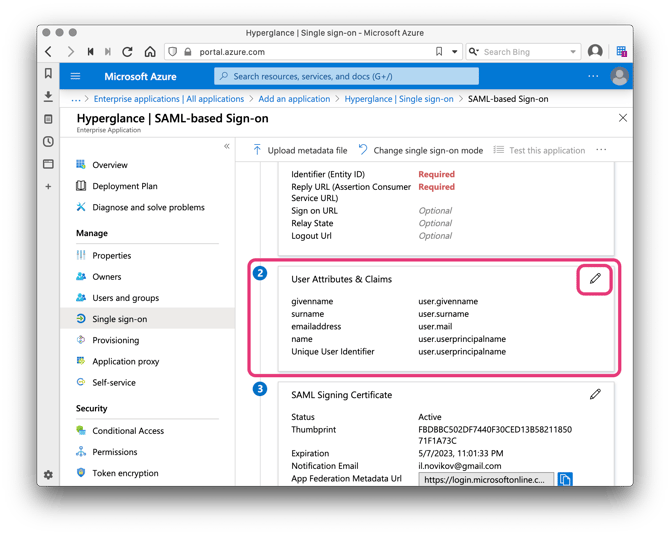
14. Back on the Azure portal, Click to edit User Attributes & Claims:
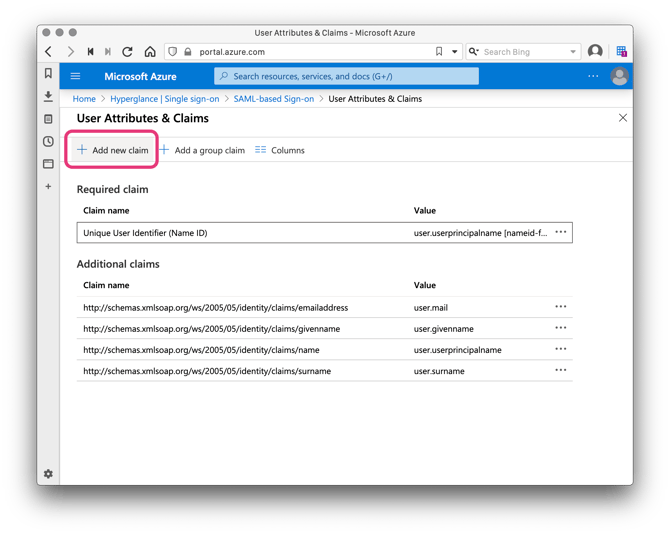
15. Click Add new claim:
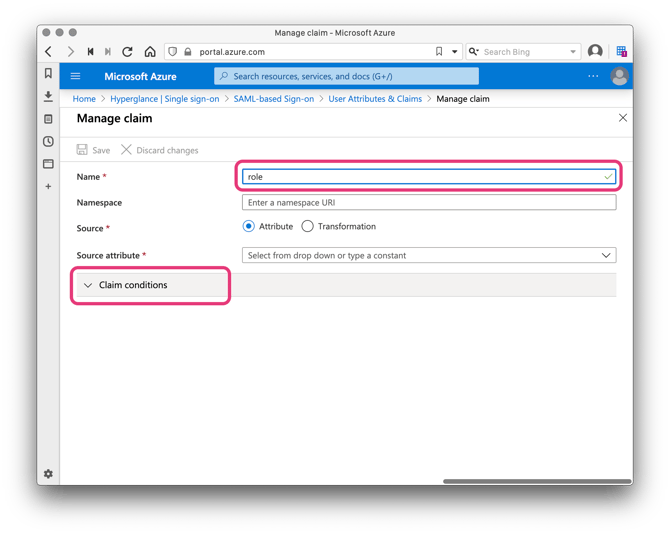
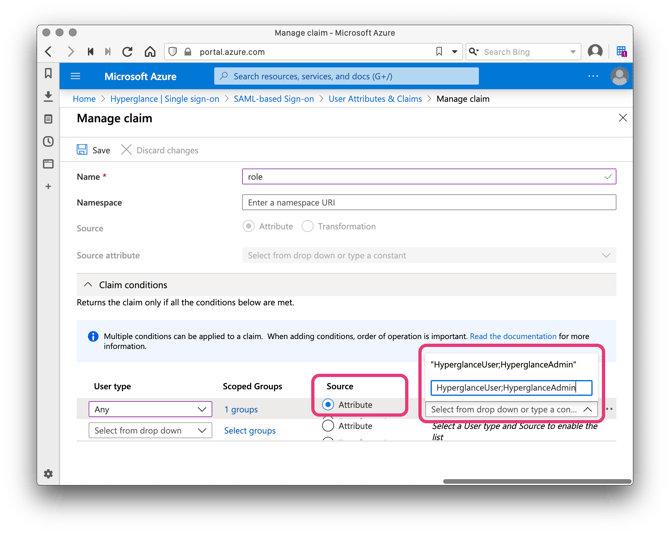
16. Name the new claim role (Hyperglance expects that name!) and expand the Claim conditions section:
17. For User type select Any and for Scoped Groups choose the Hyperglance Admin group we created earlier:
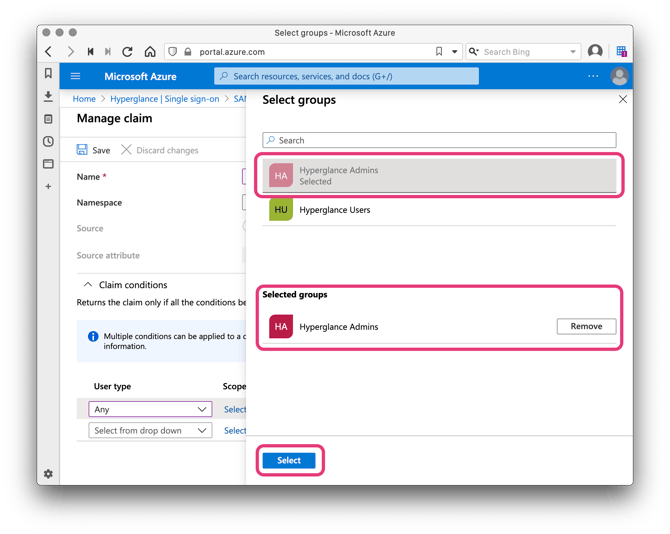
18. Set the Source to Attribute and type in HyperglanceUser;HyperglanceAdmin as the Value.
Note: There must not be any spaces around the semicolon that separates the Hyperglance role names.
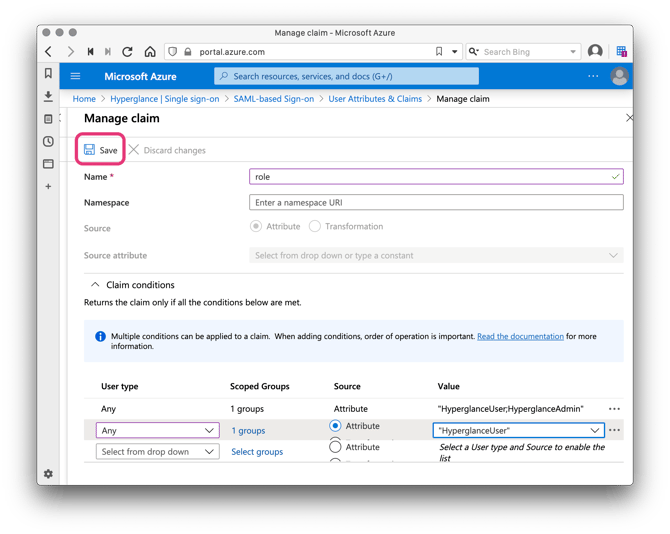
If you added any additional groups at the steps 3-5, then add them with additional claim conditions as above and assign them the appropriate set of Hyperglance roles.
19. Click Save
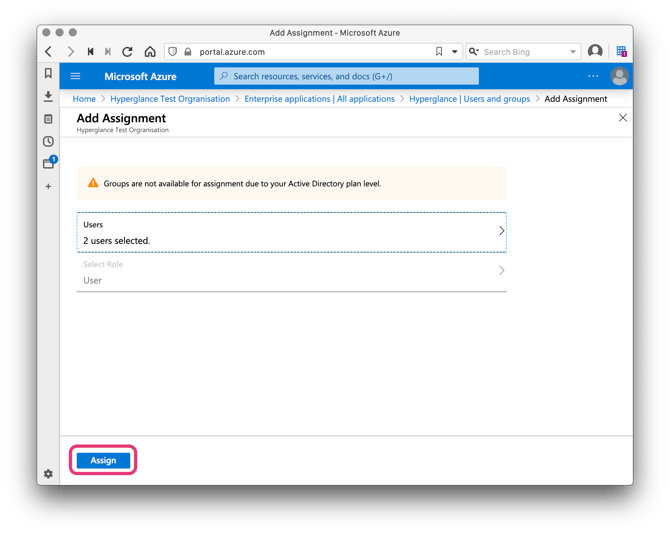
20. Navigate to Users and groups and click Add user

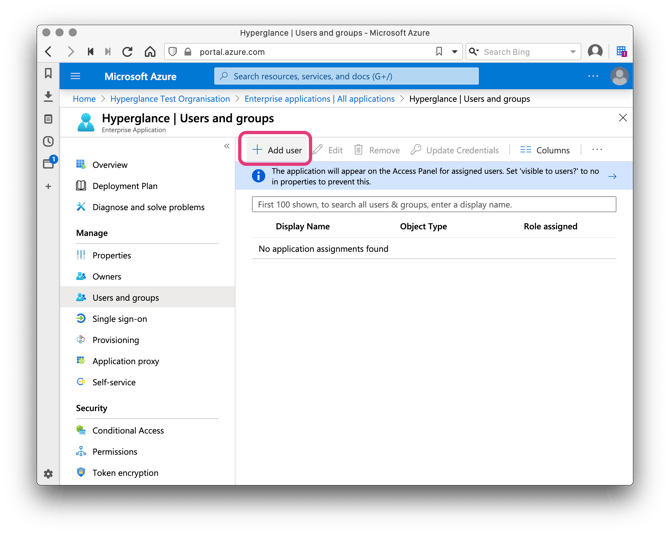
21. Select users and/or groups that you will allow to access the Hyperglance application. Hyperglance will also show in their apps access panel (e.g http://myapps.microsoft.com ).
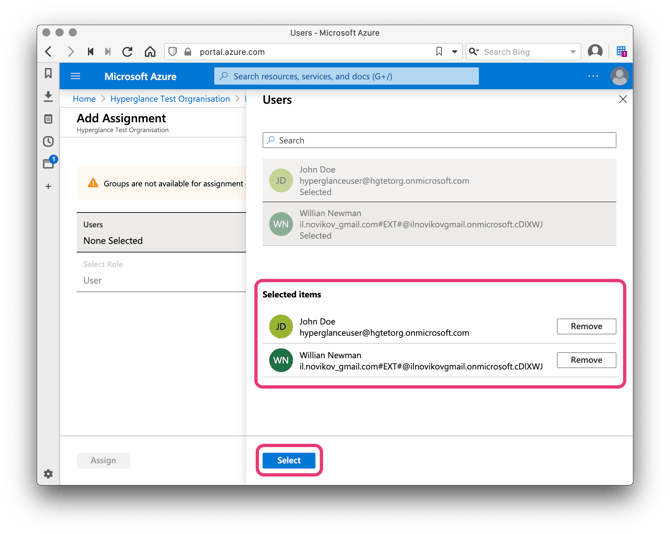
When ready click Assign:
22. We now apply the updated values.yaml with our SAML configuration by running the command sudo hg apply-config.
23. Azure will now suggest you test your new SSO configuration. Try it, it should now work!
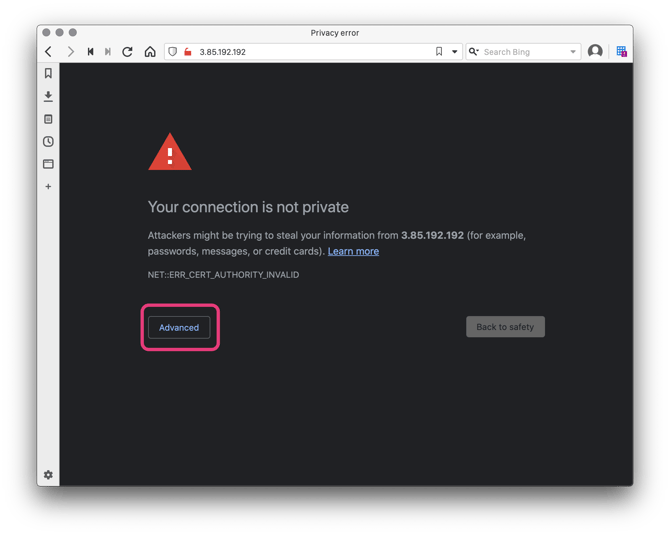
During your first visit to Hyperglance, you may be prompted by your browser to acknowledge that Hyperglance (by default) ships with a self-signed SSL/TLS certificate.
If this happens accept the warning by clicking Advanced and then Proceed (Note different browsers may show this differently):
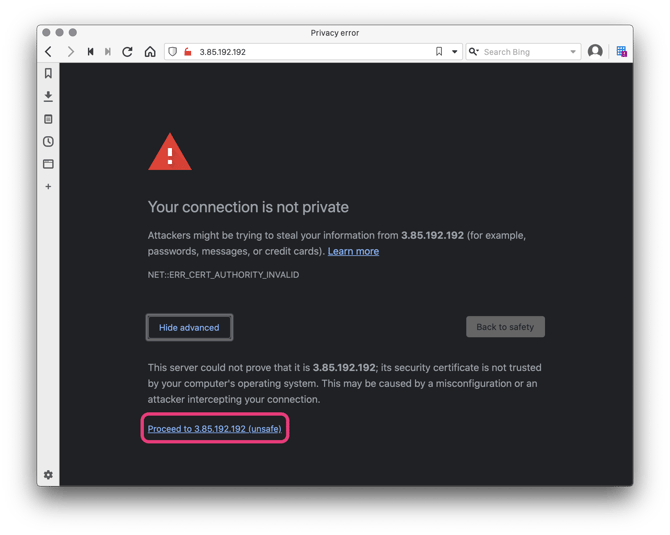
If you are also asked to resubmit the form data then choose to accept.
All being well you should now be logged in to Hyperglance!