
In this article, you'll learn:
About The Hyperglance VM
Deploying to an Azure virtual network (vNet) can be implemented with or without a public IP address assigned to the VM. For security, the recommended deployment option is to deploy without a public IP. In these instructions, only a private IP address is used, and connection to the VM is possible only with a point-to-site VPN, site-to-site VPN, ExpressRoute or a jump box virtual machine which has a public IP address.
This hyperglance virtual machine needs to be able to access various public Azure API endpoints such as https://management.azure.com. Because of that, you should allow outbound traffic from the virtual machine to those addresses. We will achieve this below using azure service tags.
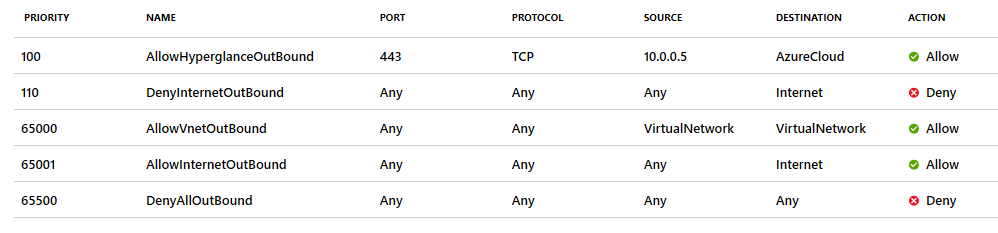
There is a service tag called AzureCloud that allows access to Public Azure IP addresses. You need to add a line in your NSG to allow these IP addresses:
You could also use the 'Internet' service tag:
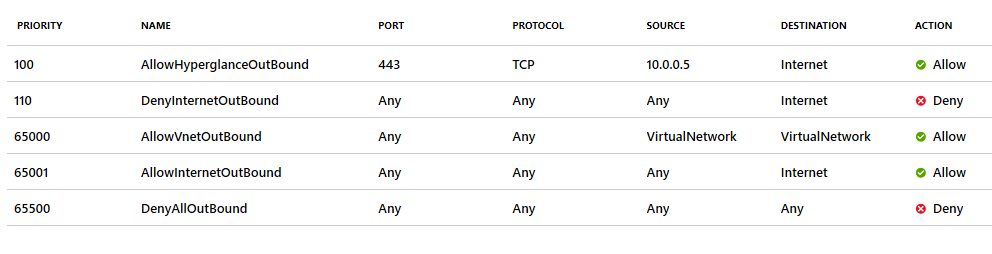
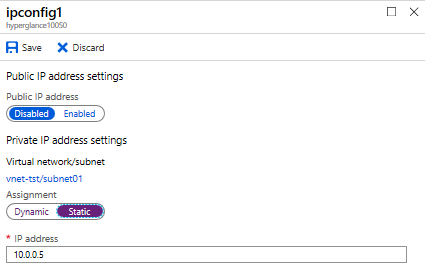
In this example, the private IP assigned to the Hyperglance VM is 10.0.0.5. You'll need to change this to reflect your deployment.
You'll see some examples above of a network security group in restricted Azure environments. The network security group is associated with a vNet IP subnet and the outbound traffic to the Internet (service tag) is blocked overriding the default AllowInternetOutBound rule.
The Hyperglance virtual machine must be able to connect to https://management.azure.com and other public Azure API service points. The network security group rule AllowHyperglanceOutBound has been created for this connection in the example picture above. Destination is a service tag Internet, the destination could still be several public Azure API service points IP addresses.
Internet traffic can also be routed via on-premises, an Azure Firewall or a virtual appliance firewall on Azure. By default, the Internet outbound traffic is routed via a public Azure IP address space or via a public IP address if this exists in a virtual machine.
If a third-party firewall is used (virtual appliances on Azure, on-premises firewalls, etc.), Azure API endpoints URLs can be whitelisted in advanced firewalls which have URL or FQDN filtering.
Note that blocking the Internet outbound traffic in a network security group does not block UDP port 53 traffic to the Azure DNS resolver IP address 168.63.129.16 (this is good to know if custom DNS servers are not used). This address 168.63.129.16 is used also for some other purposes in Azure.
Get Started in Azure Marketplace
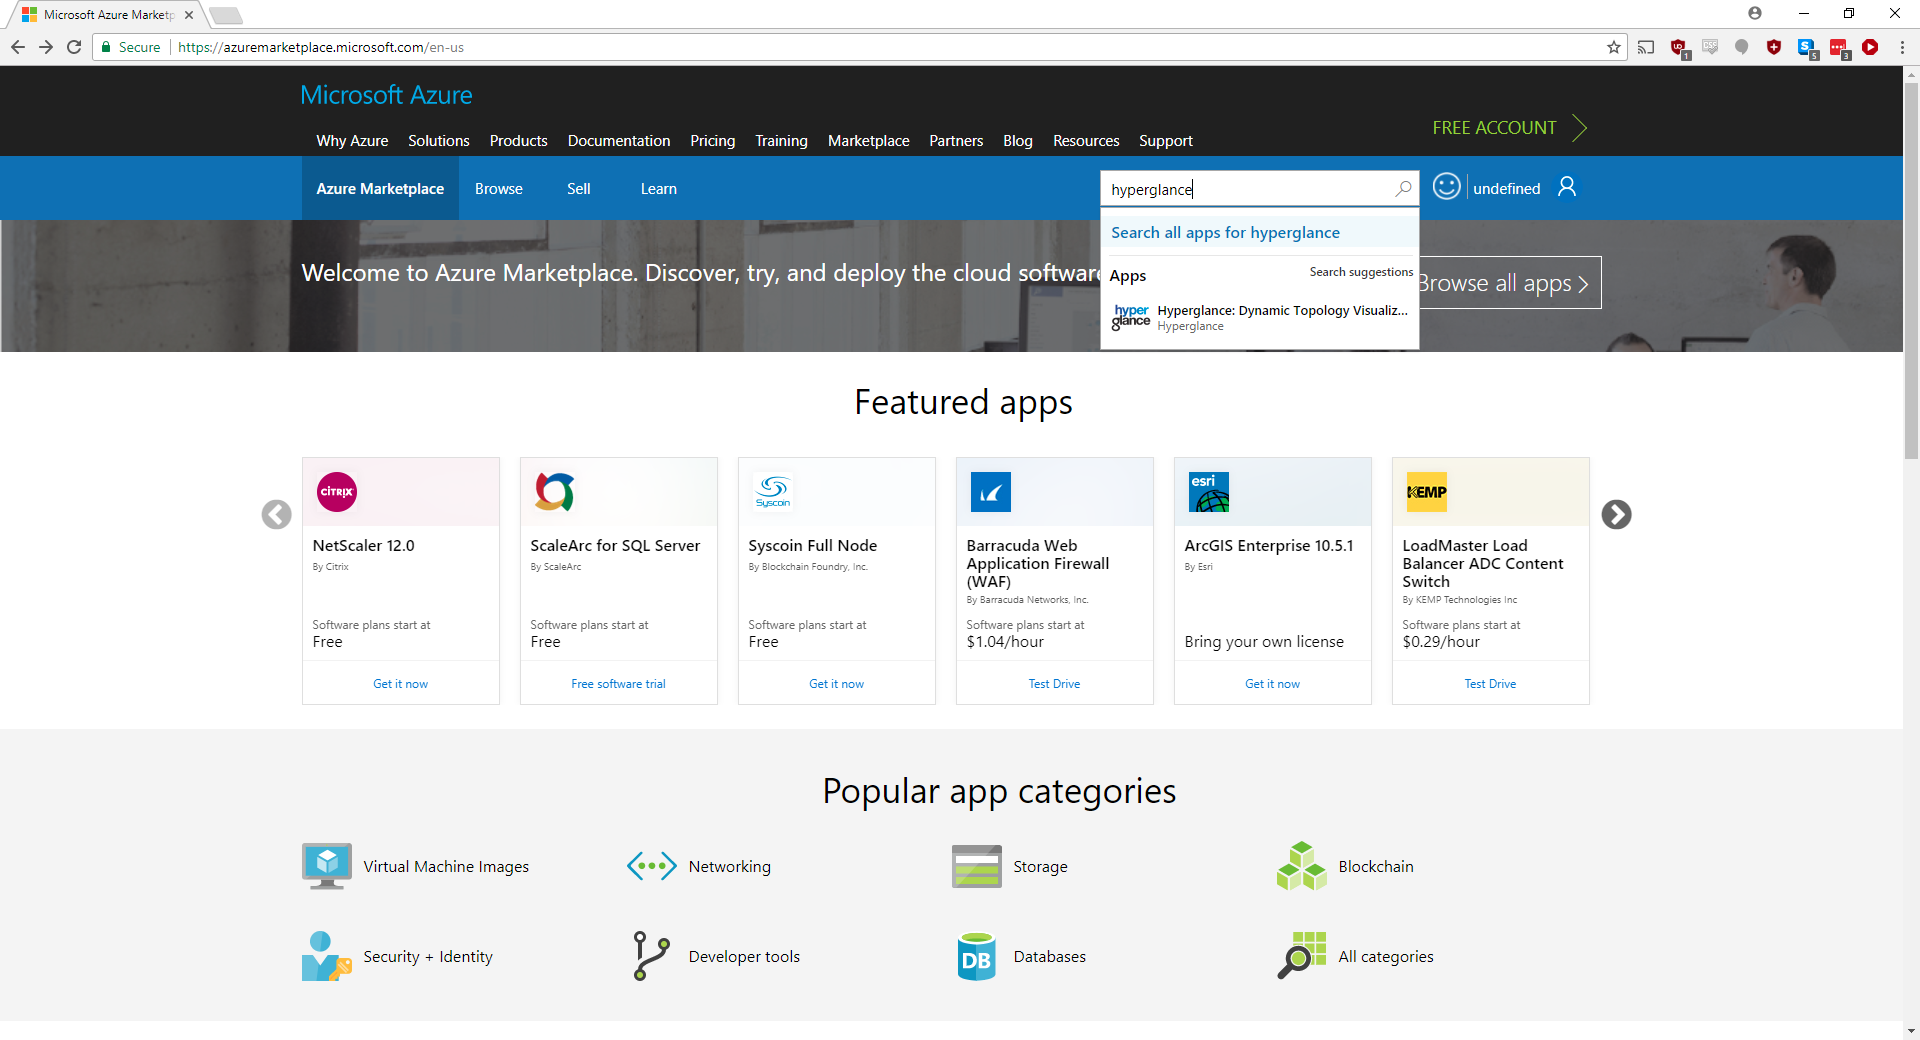
1. Go to the Azure Marketplace go to the Azure portal, select ‘Create a resource’ and search for 'hyperglance'
2. You will be presented with the initial Hyperglance overview. Select 'Plans + Pricing'
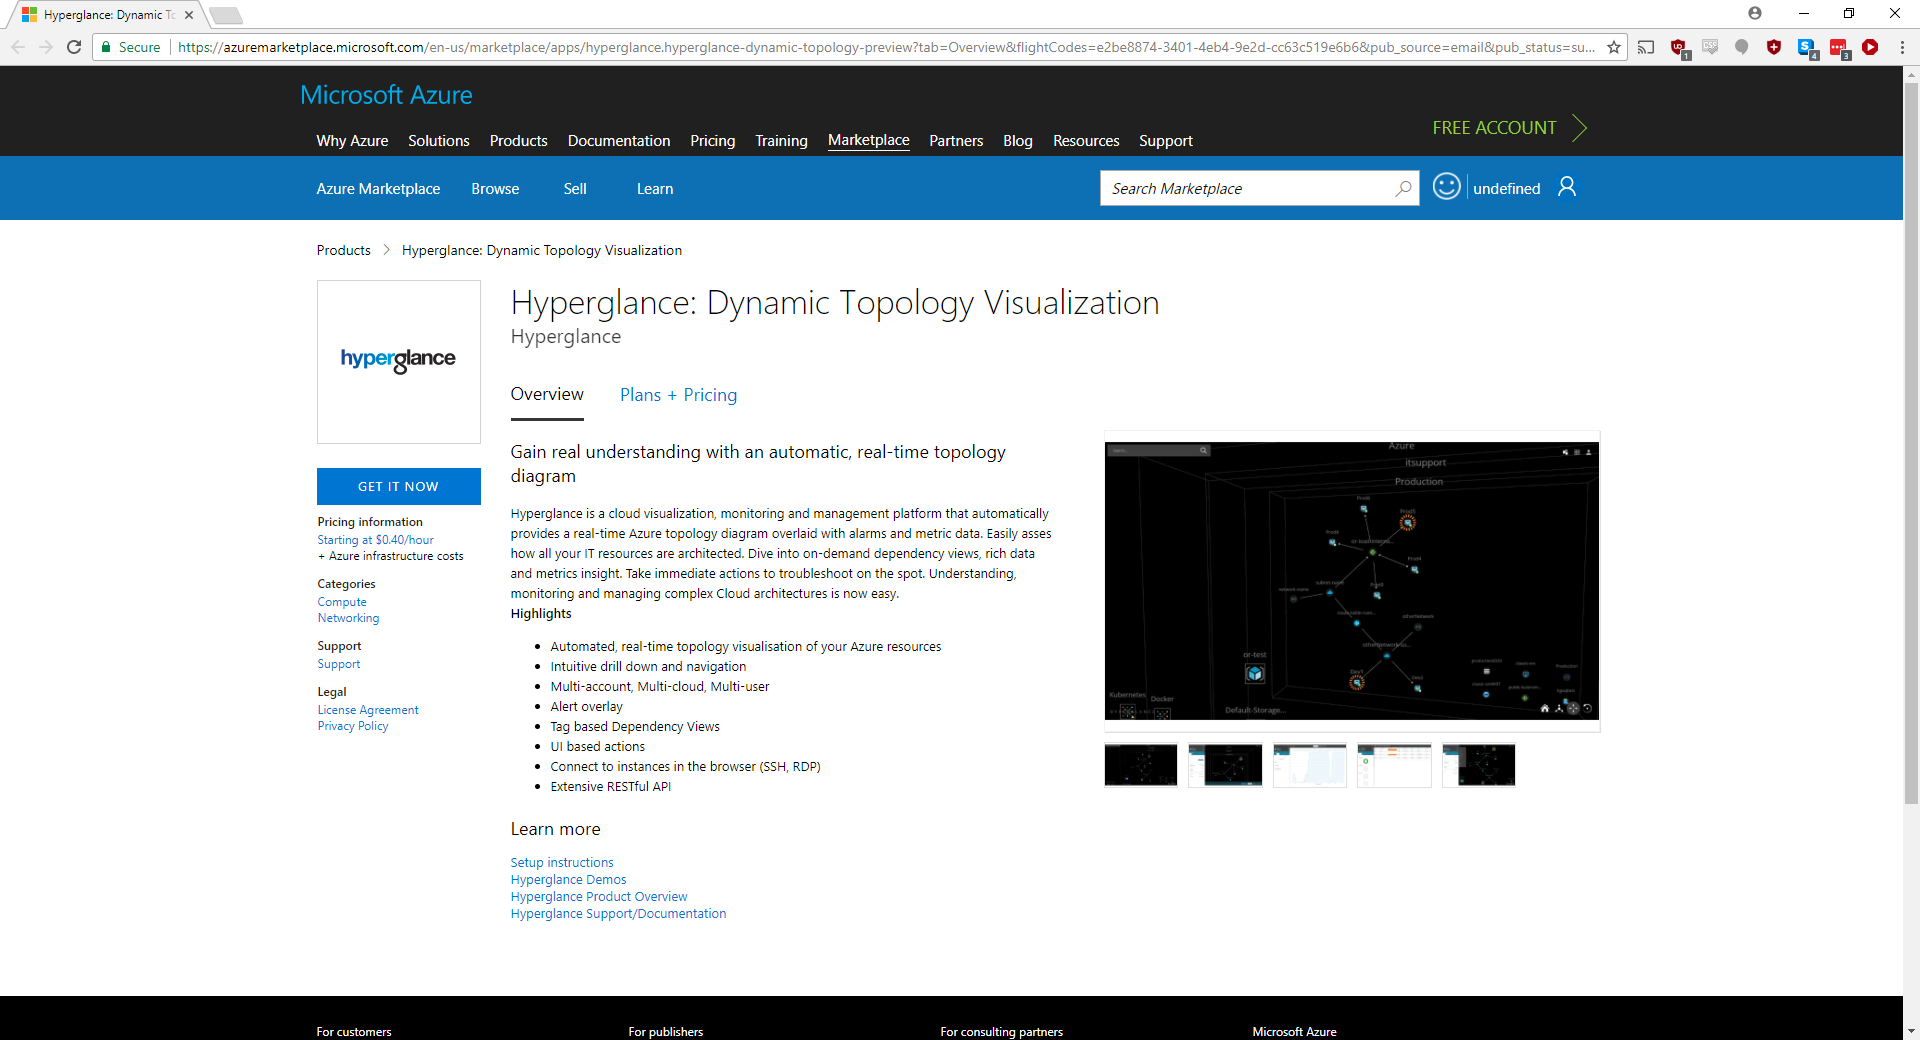
3. Choose the resource limit that best fits your environment. Any nodes over the limit will not be shown in Hyperglance and you will be shown a message telling you how many resources Hyperglance has found. If you find you have underestimated the number of resources, you just need to delete the Virtual Machine and provision a higher resource count Virtual Machine.
Once you've chosen your plan, select 'Create'.

5. Go to 'Basics'. A minimum of 2x vCPU and 4GB RAM is recommended.

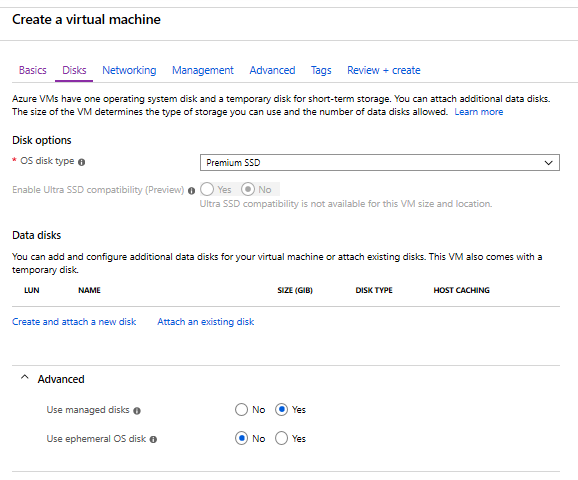
6. Go to 'Disks'. We recommend leaving the default values.
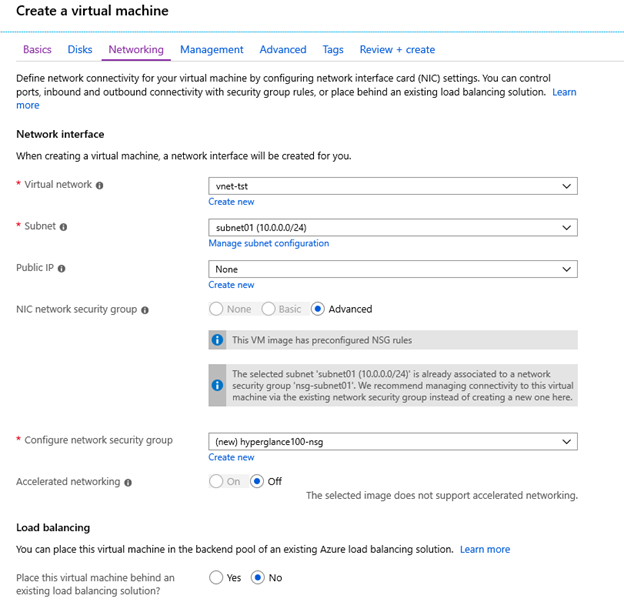
7. Go to 'Networking'. In this case, a public IP address is not created. Select an existing VNet and subnet or create new ones if needed.
8. Go to 'Management' and choose your options.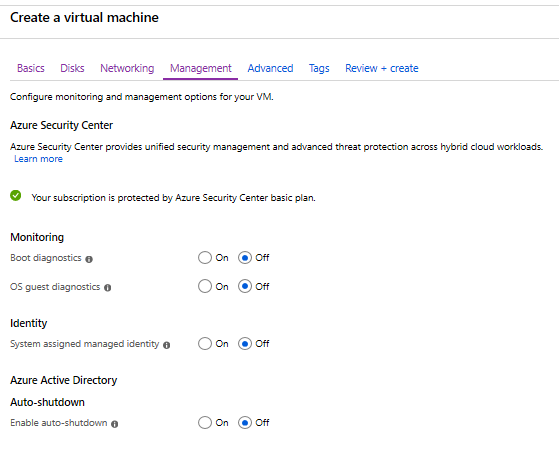
9. Go to 'Advanced'. Extensions can be installed later if needed.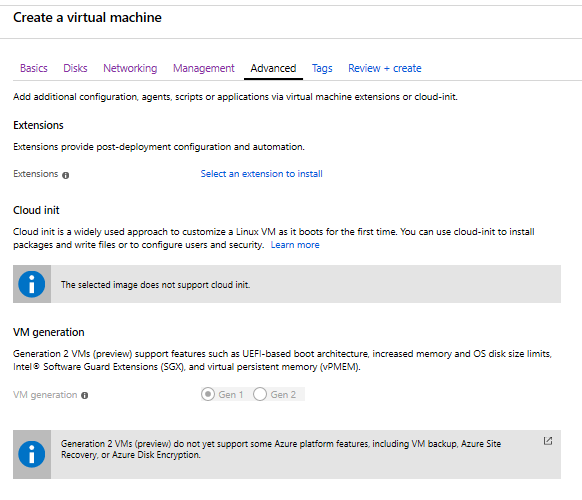
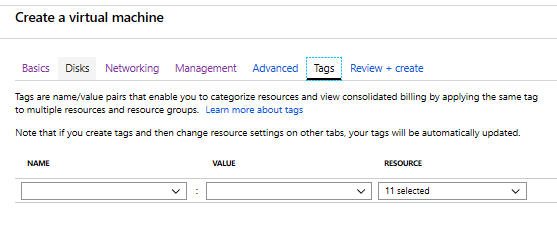
10. Go to 'Tags' and any that you are using.
11. Go to 'Review + create', selecting to 'Create'.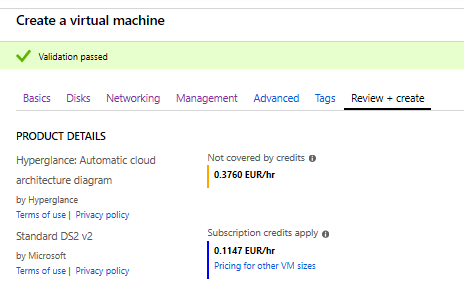
12. We recommend changing to a static IP, then saving this setting.
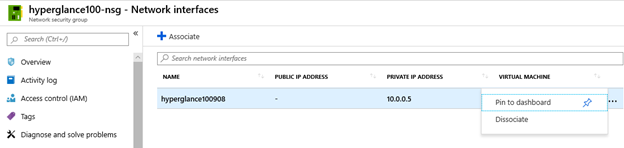
13. This deployment has now associated a new network security group with a network interface with two custom inbound security rules (allow TCP ports 22 and 443 from any). When using a public IP address in a virtual machine, these two custom security rules should be re-configured (source IP restrictions and/or custom ports). When not using a public IP address or not wanting to keep a network security group in a network interface, this new network security group can be dissociated from the network interface and deleted.

14. Make sure you use these instructions to update Hyperglance to the latest version. All user data is retained through an update, including authentication credentials, rules, and tag-view keys.
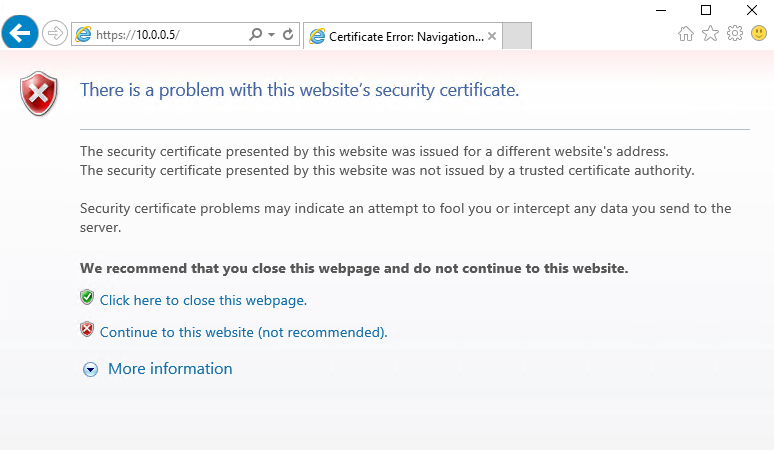
15. Once the VM has finished deploying, open a browser and enter a URL of https://[ReplaceWithHyperglanceVMIP], e.g. https://10.0.0.5
Depending on your network setup, you may need to configure Hyperglance to use a proxy
16. Accept your browser's security warning, so you can continue to the Hyperglance console.
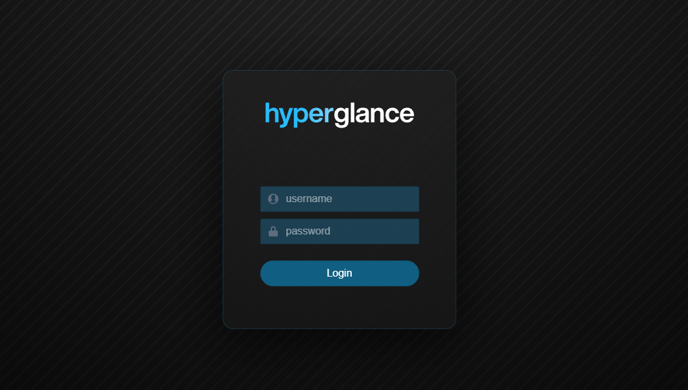
17. Log in with a username of ‘admin‘. The password will be the computer name of the VM.
The first time you log in you will be asked to enter some Azure account credentials for Hyperglance. Use these instructions if you'd like to change the Hyperglance password.
18. Hyperglance will automatically update to the latest version, assuming you are connected to the internet. If you weren't connected during your setup, make sure you use these instructions to update Hyperglance to the latest version. All user data is retained through an update, including authentication credentials, rules, and tag-view keys.
Azure Collection Setup
In order for Hyperglance to be able to authenticate to the Azure APIs to collect the data it requires. For that to happen, you need to follow some steps that will first create an app, then will assign that app ‘Reader’ access for each subscription you want to bring into Hyperglance.
In this guide, we will walk you through the setup process which consists of the following steps:
- Step 1: Register the Hyperglance app with Azure Entra ID (formerly Azure Active Directory)
- Step 2: Find the Application ID
- Step 3: Create a Secret
- Step 4: Find your Subscription ID
- Step 5: Grant roles
- Step 6: Configure Hyperglance
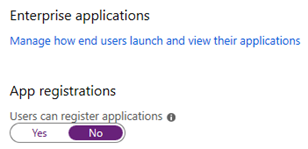
You will need to have a role Global Administrator, Application Administrator or Application Developer in your Azure Entra ID in order to complete these steps if 'Users can register applications' is set to 'No'
You also must be a Service Administrator, Co-Administrator, Owner or User Access Administrator in your subscription in order to complete these steps (in the grant roles step, the minimum role is User Access Administrator).
Step 1: Register the Hyperglance app with Azure Entra ID
a) Log in to your Azure Account through the Azure portal
b) Navigate to 'Azure Entra ID'
c) Select 'App registrations'
d) Select 'New registration'
e) Give the application a name, e.g. Hyperglance, then select 'Register'
Step 2: Find the Application ID
a) Select 'App registrations' and you'll be shown the application ID. The same ID can be found also under Enterprise applications.

b) Make a note of the Application ID - you'll need it later
Step 3: Create a Secret
a) Select 'Certificates & secrets'
b) Select 'New client secret', add a description (optional), select an expiration, then 'Add'
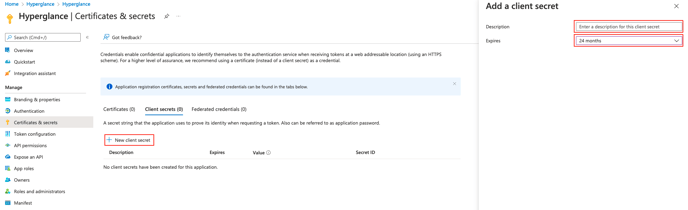
c) Make a note of the new secret value - you'll need it later

Step 4: Find your Subscription ID
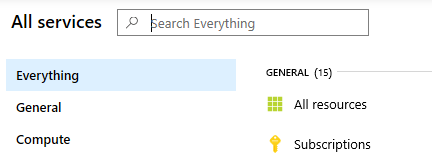
a) In your Azure portal dashboard, select 'All Services' then 'Subscriptions'
b) Make a note of the subscription ID - you'll need this later, too
Step 5: Grant roles
Here we grant the Hyperglance application access to monitor your Azure environment.
To complete these steps, you need to be a Service Administrator, Co-Administrator, Owner, or User Access Administrator
a) To assign a role at the subscription scope, select All Services and Subscriptions again.
And there select your subscription, Access control and click Add (Add a role assignment).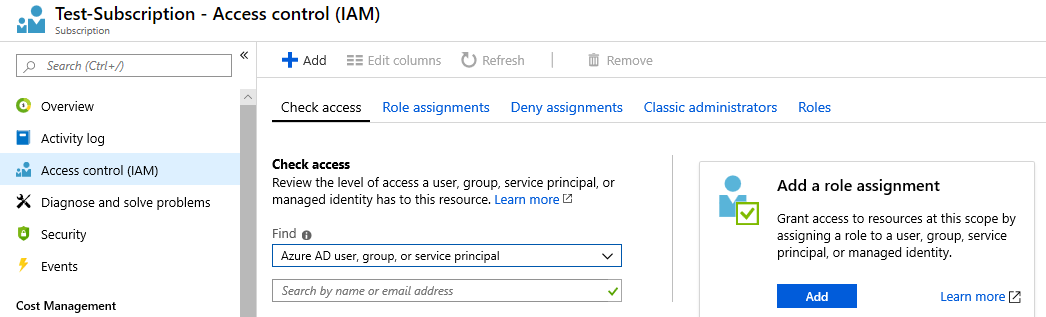
b) Select the role. You should grant either 'Reader' or 'Contributor' role.
- Reader is read-only so you will not be able to use Hyperglance’s management actions such as "Add Tag".
- Contributor allows Hyperglance Actions to work.
c) Click Save to finish assigning the role.
d) If you granted Reader (rather than Contributor), and want Hyperglance to ingest your billing data, then there are additional read-only roles you should add: "Billing Reader" and "Reader and Data Access". [Learn more about required roles for billing ingestion].
Step 6: Configure Hyperglance
Depending on your network setup, you may need to configure Hyperglance to use a proxy
a) In your browser, visit the Hyperglance Settings https://[ReplaceWithHyperglanceIP]
b) Select Settings > Platforms, then click CONNECT SUBSCRIPTION:
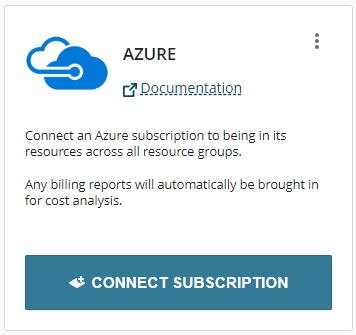
You are now presented with the Connect Azure Subscription dialog: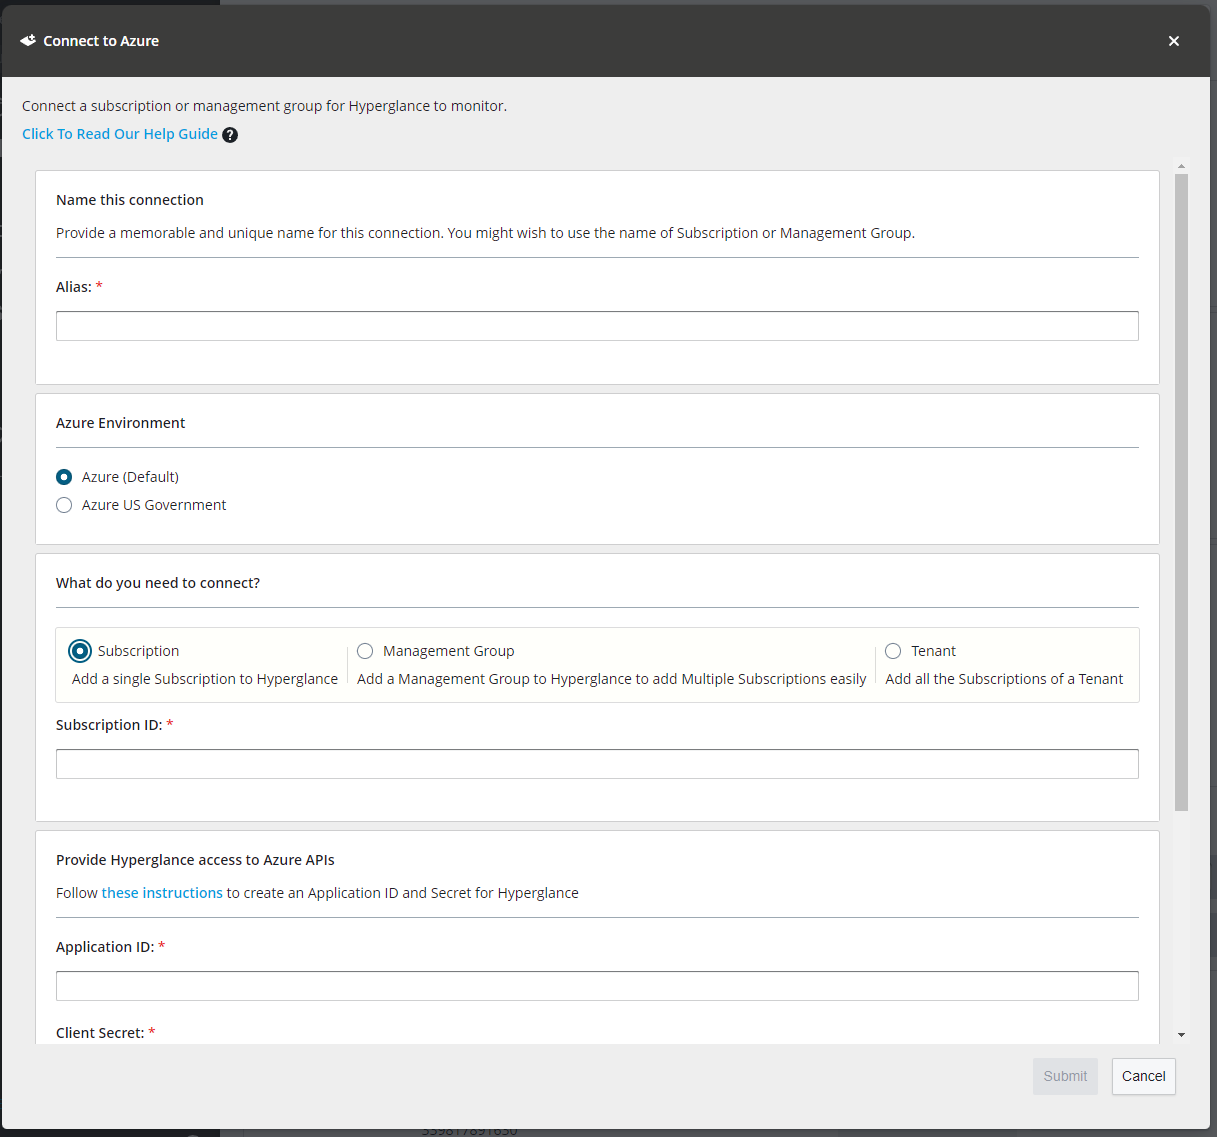
c. Fill in the following details:
i. Account Alias – This can be anything you want but must be unique and should be informative.
ii. Subscription ID – See “Step 4: Find Your Subscription ID”
iii. Application ID – See “Step 2: Find the Application ID”
iv. Client Secret – See Step 3: “Create a Secret”
d. Click submit.
Deploy Hyperglance Automations for Azure
This is an optional module to enable automations capabilities. Without this module Hyperglance is read-only and will not take actions against your cloud environment.
Follow the guide on our Github readme: https://github.com/hyperglance/azure-rule-automations
Congratulations! You have successfully finished setting up Azure in Hyperglance!
Having Problems?
If you run into any issues setting up Hyperlglance, please log a support ticket and one of the team will be in touch to give you a hand.